Before we can run a simple Hello World App we need to install the programming environment. We will run Hello World on the Android Emulator (which runs very slowly) and on the phone (which is super fast). The best resource for developing Android apps is Android Developers. We will use developers as a source for material for parts of this course.
The Android SDK provides you the API libraries and developer tools necessary to build, test, and debug apps for Android. You need to download the ADT (Android Development Tools) Bundle to develop, run and debug apps. The bundle includes the essential Android SDK components and a version of the Eclipse IDE with built-in ADT. The ADT product includes Eclipse Platform.
The ADT Bundle includes everything you need:
Click on Get Android SDK ADT Bundle to get started.
The default download is for Mac OS X but you will find ADT Bundles for Windows and Linux under download for other platforms. If you have an existing version of Eclipse you can add the Android app development to it: check out use an existing IDE. I would recommend installing the complete bundle even if that means you have multiple Eclipse IDEs installed.
Unzip the file adt-bundle-mac-86_64.zip (assuming Mac OS X is the target) and save it to a new directory (e.g., development). Go to android_development/adt-bundle-mac-86_64/eclipse/ directory and launch eclipse. You are ready to build and run the Hello World app.
The ADT stores your projects in a folder called workspace. I have selected my development directory for the workspace, as shown the below. Also click use this as a default and never ask me again.
You will get a welcome page once you have selected your workspace as shown below. Feel to read through the pages or not at this stage -- we will cover this material in the notes.
There are several packages associated with the Android SDK. If you look in the directory android_development/adt-bundle-mac-86_64/sdk/ you will see a number of sub directories associated with these packages. For more information of what's in these directories checkout exploring the SDK
You can use the Android SDK Manager to get new or update existing packages such as APIs. But here is an important caveat: the Android APIs, SDK and ADT are constantly being updated. The new version of the Android SDK Tools (version 22.6) has just been released. If you download the current ADT bundle the current Android SDK Tools version is 22.3. Do not update this to 22.6. In addition, the version of the ADT is v22.3.0-887826. Do not update this either.
Just to make this clear. If you go to Window->Android SDK Manager you will see the window below. Read the comment in the bubble.
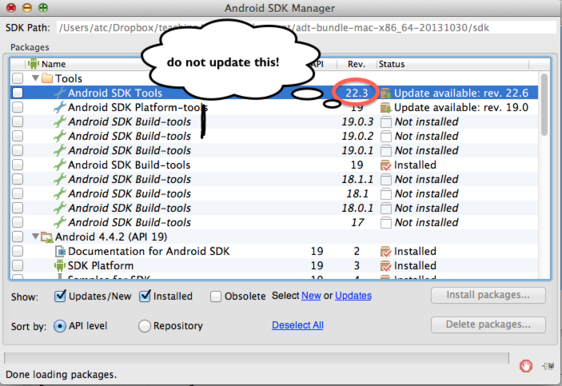
If you do update them by accident there are a number of work arounds that are tedious to deploy so try hard not to update.
To start a new Android app project for HelloWorld follow the wizard input; that is:
- Click File > New > Android Application Project.
- Fill in the application name, project name and package name as shown below. For Minimum Required SDK, Target SDK, Compile With and Theme just accept the default and click next.

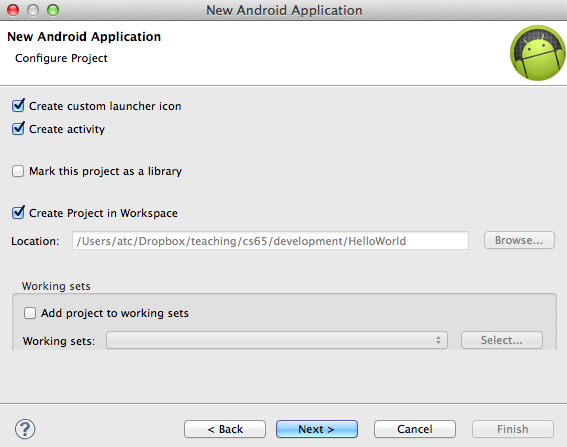
- Configure project as shown below -- accepting the default settings and click next
- Configure launcher icon -- just click through accepting the default settings and click next
- Create activity. Here you select an activity template for your app. Select BlankActivity and click Next.
- New blank activity. Again, just click through accepting the default settings then click finish
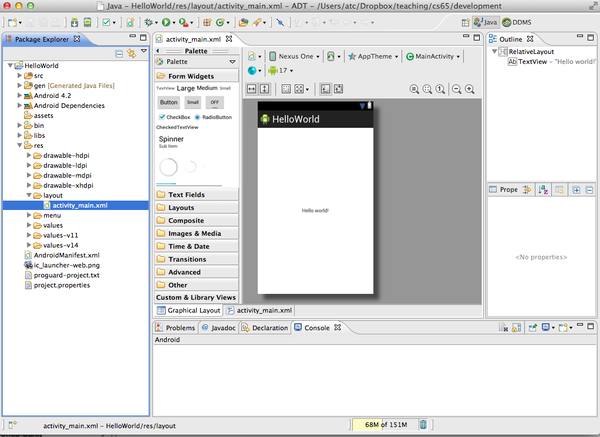
Once you have clicked finished you are presented with the project and all its files as shown below.
Once you have created a new project you have to create a configuration before you run the code.
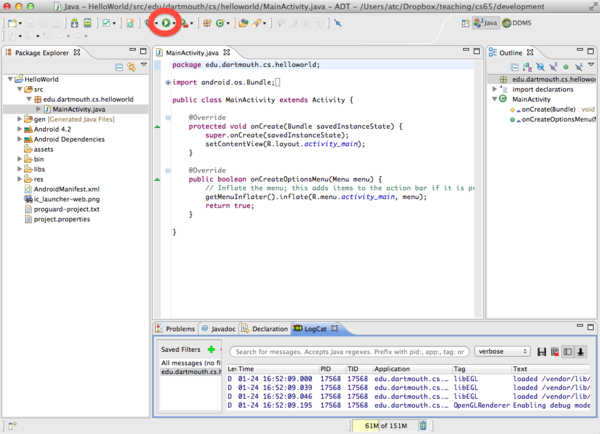
Open the src folder and look at the MainActivity.java code.
package edu.dartmouth.cs.helloworld;

import android.os.Bundle;
import android.app.Activity;
import android.view.Menu;

public class MainActivity extends Activity {

    @Override
    protected void onCreate(Bundle savedInstanceState) {
        super.onCreate(savedInstanceState);
        setContentView(R.layout.activity_main);
    }

    @Override
    public boolean onCreateOptionsMenu(Menu menu) {
        // Inflate the menu; this adds items to the action bar if it is present.
        getMenuInflater().inflate(R.menu.main, menu);
        return true;
    }

}How you run your app depends on two things: whether you have a real Android-powered device and whether you're using Eclipse. This lesson shows you how to install and run your app on a real device and on the Android emulator, and in both cases with either Eclipse or the command line tools.
Let's run our program directly on the phone. The big advantage of using the phone to develop is that it is fast to load and run programs. In contrast the emulator discussed next runs slowly in comparison and is irritating to use for a course -- but it is a good back up. Before we get started plug your phone into you laptop using the USB port, as shown below. Eclipse installs the Hello World app on your connected phone and starts it.

Next, go to settings on your phone and select Developer option and then select USB debugging -- this will allow the ADT to communicate with the phone to program it.
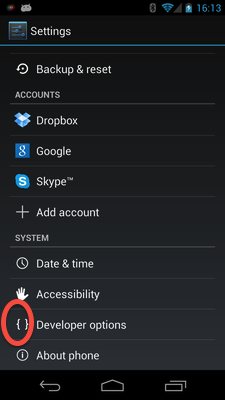
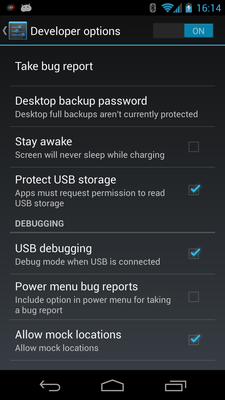
If you do not see developer option (circled on the image above) watch this video and it mystery will be revealed.
Basically the vendors and providers don't want that option accessible without enabling it -- for good reason. So as the video shows if you cannot see the developer options button, you should tap on the About phone button (under settings) and the click the Build number' button 7~8 times and voila -- now you see developer option. Now go in to developer option and select USB debugging.

If for some reason you do not see the app running on the phone check that you see USB enabled in the status bar as indicated below
If it is not go make sure you clicked and enabled the USB debugging option, as discussed above.
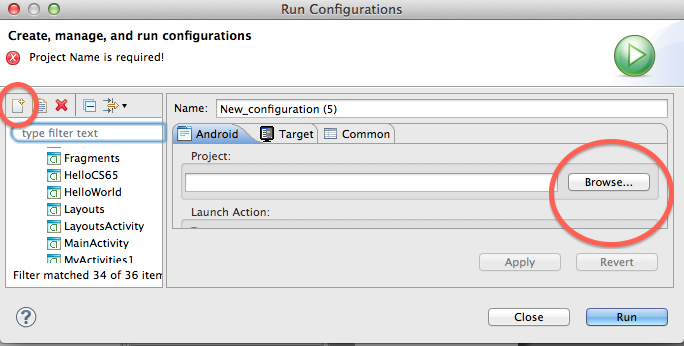
If you still have problems -- you shouldn't -- but if you do then. On ADT go to the run->run configurations .. and:

Now you should see you HellWorld on the phone.
Now let's run the program on the emulator -- that's right it emulates the functionality of the phone as best it can. And for developers without a phone it allows them to run code, test and debug code. Code that runs on the emulator runs unchanged on the real device.
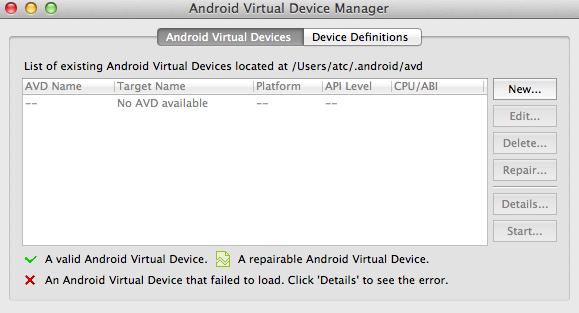
Before you can run Hello World on the emulator you need to set up an Android Virtual Device (AVD). Because Android runs on everything from phones, watches, tablets you need to configure the AVD to your requirements -- speed, memory, network, etc. -- so it can emulate specific phone system requirements.
To create an AVD:
- Launch the Android Virtual Device Manager: from the toolbar Window > Android Virtual Device Manager
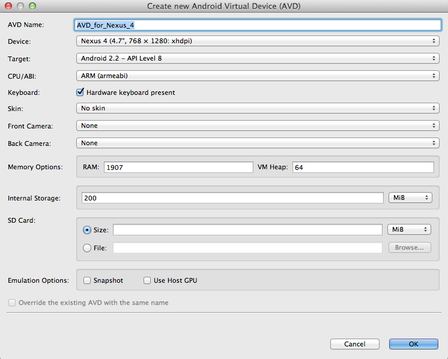
- In the Android Virtual Device Manager panel, click on Device Configurations and select Nexus 4 and select Create AVD

- Then set up the AVD using the setting shown below (these are the defaults that are preset). Set the Target to API 19 for 4.2.2
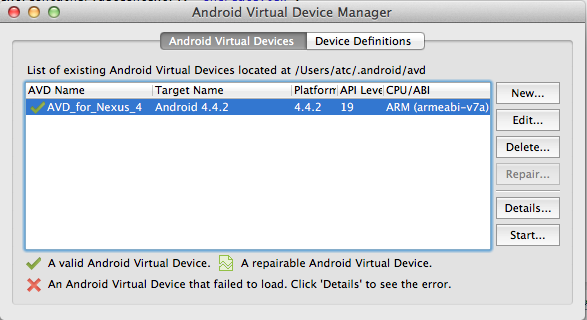
- You should see the new AVD_for_Nexus_4 under AVD Name from the Android Virtual
To run the app from Eclipse:
- Click on the Hello World project file and click Run from the toolbar. A device window will pop up. Select the AVD_for_Nexus_4.
- The ADT (aka Eclipse) will installs the app (the HelloWorld.apk) on your AVD and starts it. this could take sometime, so go for a coffee ;-)
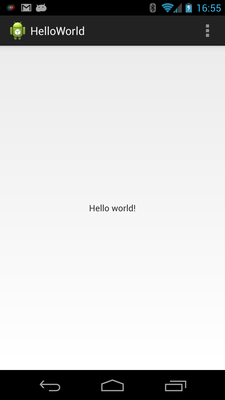
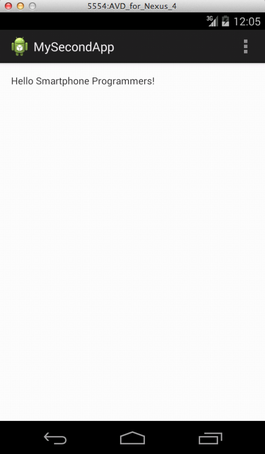
- You will see the AVD_for_Nexus_4 you created with the screen locked - unlock it by dragging the lock icon to the right. What you should see is the Hello World app running, as shown below.
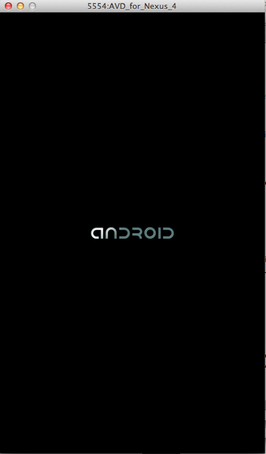
It can take sometime to run the emulator. There are faster emulators out there but overall the one that comes with the ADT is just to slow to be useful.
Here is the console out on ADT once the emulator was launched.
[2014-03-24 22:49:37 - MySecondApp] Android Launch!
[2014-03-24 22:49:37 - MySecondApp] adb is running normally.
[2014-03-24 22:49:37 - MySecondApp] Performing edu.dartmouth.cs.mysecondapp.MainActivity activity launch
[2014-03-24 22:49:50 - MySecondApp] Launching a new emulator with Virtual Device 'AVD_for_Nexus_4'
[2014-03-24 22:50:27 - Emulator] emulator: emulator window was out of view and was recentered
[2014-03-24 22:50:27 - Emulator]
[2014-03-24 22:50:27 - MySecondApp] New emulator found: emulator-5554
[2014-03-24 22:50:27 - MySecondApp] Waiting for HOME ('android.process.acore') to be launched...
[2014-03-24 22:52:53 - MySecondApp] HOME is up on device 'emulator-5554'
[2014-03-24 22:52:53 - MySecondApp] Uploading MySecondApp.apk onto device 'emulator-5554'
[2014-03-24 22:52:54 - MySecondApp] Installing MySecondApp.apk...
[2014-03-24 22:54:34 - MySecondApp] Success!
[2014-03-24 22:54:35 - MySecondApp] Starting activity edu.dartmouth.cs.mysecondapp.MainActivity on device emulator-5554
[2014-03-24 22:54:39 - MySecondApp] ActivityManager: Starting: Intent { act=android.intent.action.MAIN cat=[android.intent.category.LAUNCHER] cmp=edu.dartmouth.cs.mysecondapp/.MainActivity }
Overall it took 5 minutes to start the emulator and run the app.
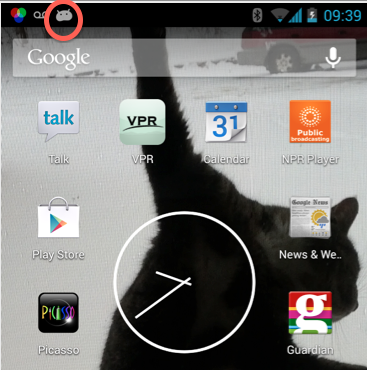
Note, that Eclipse is bundled with ADT. You can find the ADT/Eclipse app under android_development/adt-bundle-mac-86_64/eclipse/Eclipse.app Drag the icon (below) from the directory and but it in your dock for easy of launching.