|
In the this lecture we study GTK programming.
We plan to learn the following from today’s lecture:
The GIMP Toolkit (GTK+) was originally designed for a raster graphics editor called the GNU Image Manipulation (GIMP). GTK+ was adopted as the default graphical toolkit of GNOME and XFCE, two of the most popular Linux desktop environments. While it was originally used on the Linux operating system, GTK+ has been expanded to support other UNIX-like operating systems: Microsoft Windows, BeOS, Solaris, Mac OS X, and others. GTK+ is written entirely in C, and the majority of GTK+ software is also written in C. Fortunately there are a number of language bindings that allow you to use GTK+ in your preferred language like C++, Python, PHP, Ruby, Perl, C#, or Java. We can develop programs with graphical interfaces by using GTK+ on the X window system.
As seen in Figure 1, GTK+ is built on top of a number of other libraries.
Glib - provides low-level data structures, types, thread support, the event loop, and dynamic loading.
GObject - implements an object-oriented system in C without requiring C++.
Pango - supports text rendering and layout.
ATK (Accessability ToolKit) - helps you create accessible applications and allows users to run your applications with screen readers and other accessibility tools.
GDK (GIMP Drawing Kit) - handles low-level graphics rendering on top of the Xlib.
GdkPixbuf - helps manipulate images within GTK+ programs.
Xlib - provides the low-level graphics on Linux and UNIX systems.
GModule - portable method for dynamically loading ’plug-ins’
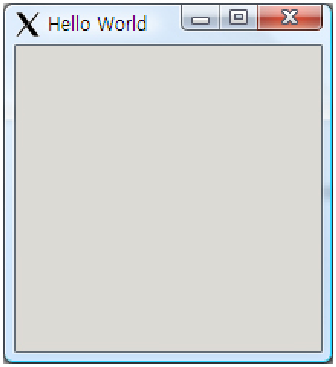
Now, we will write a simple GTK+ program. It doesn’t do much, but it shows the basic structure which is needed to make a program with a GUI on Linux. Figure 2 is the screenshot of the program. The program will not be killed even though you press the ’X’ button. You should kill this program by using Ctrl+c on the terminal because it does not have code to destroy a program.
The following code is for making a simple window.
The <gtk/gtk.h> file includes all of the widgets, variables, functions, and structures available in GTK+ as well as header files from other libraries that GTK+ depends on. When you implement applications using GTK+, it is enough to use only <gtk/gtk.h>, except for some advanced applications.
The following code declares a pointer variable for a GtkWidget object.
A GTK+ program consists of widgets. Components such as windows, buttons, and scrollbars are called widgets. We will see widgets in detail later.
The following function initializes GTK+
By calling gtk_init(), all initialization work is automatically performed for you. It begins by setting up the GTK+ environment, including obtaining the GDK display and preparing the GLib main event loop and basic signal handling. It is important to call gtk_init() before any other function calls to the GTK+ libraries. Otherwise, your application will not work properly and will likely crash.
The following code creates a new GtkWindow object and sets some properties.
gtk_window_new() creates a GtkWindow object that is set to the default width and height of 200 pixels. We passed GTK_WINDOW_TOPLEVEL to gtk_window_new(). This makes GTK+ create a new top-level window. Top-level windows use window manager decorations, have a border frame, and allow themselves to be placed by the window manager. Conversely, you can use GTK_WINDOW_POPUP to create a pop-up window. Pop-up windows are used for things that are not normally thought of as windows, such as tooltips and menus. GTK_WINDOW_TOPLEVEL and GTK_WINDOW_POPUP are the only two elements available in the GtkWindowType enumeration.
The following function, gtk_window_set_title(), requests the title bar and taskbar to display ”Hello World” as the title of the window. The first parameter is for GtkWindow object and the second one is the string that you want to display.
Lastly, the gtk_widget_show() function tells GTK+ to set the specified widget as visible. The widget may not be immediately shown when you call gtk_widget_show(), because GTK+ queues the widget until all preprocessing is completed before it is drawn onto the screen.
This function is the main loop that takes control and starts processing events.
The gtk_main() function will continue to run until you call gtk_main_quit() or the application terminates. This should be the last GTK+ function called in main(). In GTK+, signals and callback functions are triggered by user actions such as button clicks, asynchronous input-output events, programmable timeouts, and others. We will explore them in the Signal, Callbacks, and Events section later.
So far, we have written a simple GTK+ program, learned about the structure of GTK+, and understood what each part means and how it works. Now, we should compile the code we wrote in order to make it executable.
The following command compiles the code.
This command can be used for most of the examples except for some which use specific library like pthread.
In addition to the GCC compiler, you need to use the pkg-config application, which returns a list of specified libraries or paths. The first instance, pkg-config --cflags gtk-2.0+, returns directory names to the compiler’s ’include path’. This will make sure that the GTK+ header files are available to the compiler. The second call, pkg-config --libs gtk-2.0+, appends options to the command line used by the linker including library directory path extensions and a list of libraries needed for linking to the executable. The libraries that are returned in a standard Linux environment are:
GTK+ is a system that relies on events, signals, and callbacks. An event is a message emitted by the X Window System. When a user performs some action like clicking a mouse or typing a keyboard, it is emitted and sent to your application to be interpreted by the signal system provided by GLib. A signal is reaction to an event, which is emitted by a GtkObject. When the event reaches a widget, the signal occurs. You can tell GTK+ to run a function when the signal is emitted. This is called a callback function.
Note that a GTK+ signal is quite separate from a UNIX signal.
After we initialize our user interface, the control is given to the gtk_main() function, which sleeps until a signal is emitted. The callback function will be called when the action has occurred and the signal is emitted or when you have explicitly emitted the signal. You can also make signals stop being emitted.
The g_signal_connect() function connects the signal.
There are four parameters. The object is the widget that is to be monitored for the signal. Next, you specify the name of the signal you want to keep track of with the signal_name. The handler is the callback function that will be called when the signal is emitted, cast with G_CALLBACK(). The last one, data allows you to send a pointer to the callback function. The return value of g_signal_connect() is the handler identifier of the signal.
Prior callback connection function was gtk_signal_connect(). This function has been replaced with g_signal_connect() and should not be used in new code.
Callback funtions
Callback functions specified in g_signal_connect() will be called when the signal is emitted on the widget to which it was connected. The callback functions are in the following form and are named by a programmer.
The first parameter widget is the object from g_signal_connect(). It must always be cast as the widget type for which the signal was created. There are other possible arguments that may appear in the middle as well, although this is not always the case. The data parameter correspond to the last argument of g_signal_connect(), which is gpointer data. Since the data is passed as a void pointer, you can replace the data type with what you want to cast.
Example
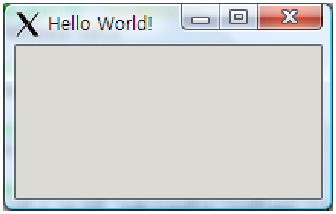
We will extend the simple ’hello world’ application which has been implemented. The extension is to connect callback functions to the window signal, so the application can terminate itself without using Ctrl+C. We will review Signals, Callbacks, and Events through this example.
This example shows you how to use signals, callbacks, and events.
Widgets are the basic building blocks of a GUI application. The widgets in GTK+ use the GObject hierarchy system, which allows you to derive new widgets from those that already exist. Child widgets inherit properties, functions, and signals from their parent, their grandparent, and so on
There are a huge number of widgets in GTK+. So, it’s hard to describe all of them here. I will try to introduce some useful widgets for the project. You can look up other widgets on the web pages which describe the GTK+ APIs described in ’Useful links’ section.
Window widget
GtkWindow is the basic element of all GTK+ applications. There are dozens of GtkWindow API calls, but here are the functions worthy of special attention.
Container widgets (layout)
The main purpose of a container class is to allow a parent widget to contain one or more children. We can organize our widgets with non-visible widgets called layout containers.
GtkBox widget
GtkBox is an abstract container widget that allows multiple children to be packed in a one dimensional, rectangular area. There are two types of boxes: GtkVBox and GtkHBox.
GtkHBox widget
This widget is a single row horizontal packing box widget.
GtkVBox widget
This widget is a single column vertical packing box widget.
Example
In this example, we will implement the application which contains hbox and vbox widgets.
We have three labels and one vbox and one hbox in the program. The vbox contains the label1 and the lable2. The hbox contains the vbox which consists of label1 and label2 and the label3. Finally, the hbox is located in the window.
These functions create a new hbox and vbox, respectively.
The first parameter represents homogeneity of all children. If it is set to TRUE, all children have equal space allotments. The second one is space between children.
This function adds child to box, packed with reference to the start of box.
This is a prototype of the function. The first parameter should be box object where children will be packed. The second one means a child widget to be added to box. These three parameters, expand, fill, and padding, are related to spacing of children.
This function adds widget to container.
This function is typically used for simple containers like GtkWindow, GtkFrame, or GtkButton. The first parameter is for a container and the second one is for a widget.
Basic widgets
GtkLabel widget
This widget is normally used to label other widgets. However, they can also be used for such things as creating large blocks of noneditable, formatted, or wrapped text.
GtkButton widget
This widget is a special type of container that turns its child into a clickable entity. It is only capable of holding one child. There are many derived widgets from GtkButton such as GtkToggleButton, GtkCheckButton, and GtkRadioButton.
GtkEntry widget
This widget is a single-line text entry widget that is commonly used to enter simple textual information. It is implemented in a general manner, so that it can be molded to fit many types of solutions. It can be used for text entry, password entry, and even number selections.
Example
This application deals with several widgets and signals, as well as callbacks we have seen above.
In this example, we try to use widgets and callback functions which we have learned so far.
This sub-function plays a role to check whether or not input password is correct.
We developed the callback function as usual. However, note that we get GtkEntry widget as an argument to retrieve password information in the function.
gtk_label_new() function creates a new label.
This function gets a text as a parameter.
These functions are related to entry widget.
gtk_entry_new() function creates a new entry widget. After creating the entry, we can set visibility of entry widget using gtk_entry_set_visibility() that has two parameters, entry and visible. Finally, we can retrieve text information from the entry widget using gtk_entry_get_text().
This function creates a new button with a label.
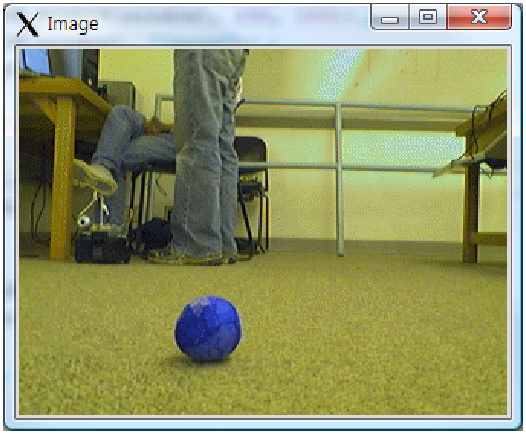
GtkImage widget
This widget is used to display an image.
Example
This function creates a new image object from a file.
We can load a variety of image formats such as JPG, BMP, GIF, TIF, PNG, and so on.
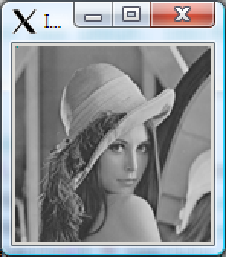
Example
This example uses different method to load an image. Unlike the previous example, an array of data will be used for the image source.
This function creates a new empty image object.
We used three functions to make an image file from data.
gdk_pixbuf_new_from_data() function creates a new GdkPixbuf from in-memory data. Currently only RGB images with 8 bits per sample are supported.
gtk_image_set_from_pixbuf() function sets the Pixbuf data to the image object.
Lastly, gtk_widget_queue_draw() function notifies X Window that the entire area of a widget needs to be updated. Eventually, the image widget will be re-drawn an image.