Getting setup with MongoDB
MongoDB Local installation
NOTE: MongoDB is NOT installed on the department servers, and without SysAdmin privileges neither can you.
It’s easy to get up and running with MongoDB. You’ll need to have a MongoDB server running on your laptop and a MongoDB client (CLI or GUI) running locally. We will be installing the Community Edition of MongoDB. You do not need to install or do anything related to MongoDB Atlas.
For the server, carefully follow the instructions for your operating system on the official installation page. Be sure that you are installing the current (8.0.4) version.
💡 TIP For Mac users, you should install the
homebrewtool as the instructions say, since it also provides the simplest way to start and stop the Mongodb server.
On the server installation pages, you willl find lots of other information that will be helpful. For example, the MacOS pages you will see where the key directories for MongoDB are:
| Intel Processor | Apple Silicon Processor | |
|---|---|---|
| configuration file | /usr/local/etc/mongod.conf |
/opt/homebrew/etc/mongod.conf |
log directory |
/usr/local/var/log/mongodb |
/opt/homebrew/var/log/mongodb |
data directory |
/usr/local/var/mongodb |
/opt/homebrew/var/mongodb |
You will also find how to start the MongoDB server as well as information on some MongoDB tools that you will need: mongoexport, mongoimport, and a monitoring tool clled mongotop.
👉 NOTE On MacOS, the install of the server will include the MongoDB shell
mongosh, but on a Windows install. you have to install it yourself. The operating system specific instructions include instructions on how to install it on Windows.
If you prefer a GUI to a command line shell, you can install MongoDB Compass, an open source GUI for MongoDB. MongoDB Compass has the shell built-in so you can switch between using GUI and command line as you wish.
Test the installation
Once you have everything installed and the server running, we will run mongosh to connect to it. The first time you start it will look something like this:
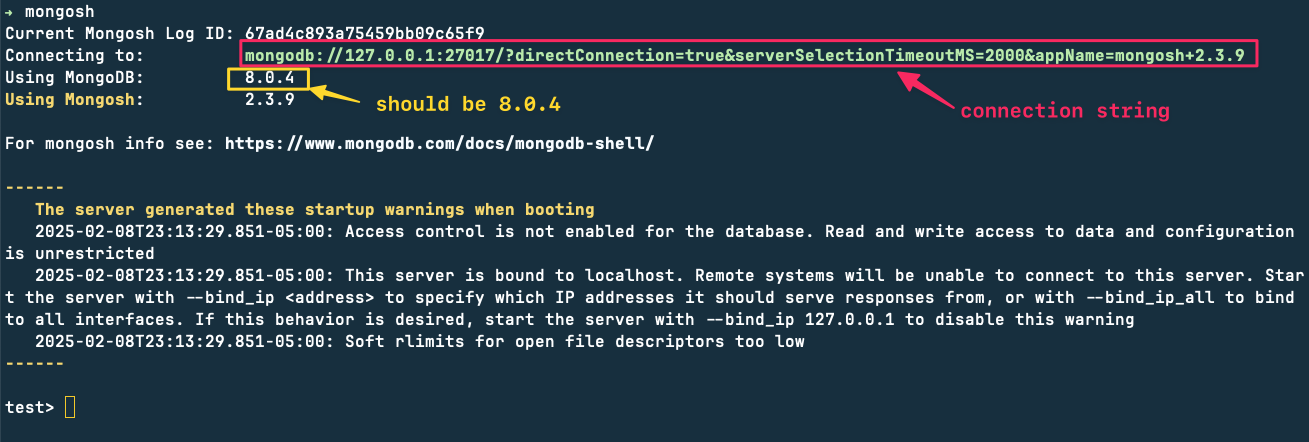
The looooong string in the red box is the “connection string”, you may need it later. Also, make sure the MongoDB version is 8.0.4 .
Enter quit or ctrl-d to exit, and your MongoDB server and MongoDB shell installations are complete!
If you installed compass
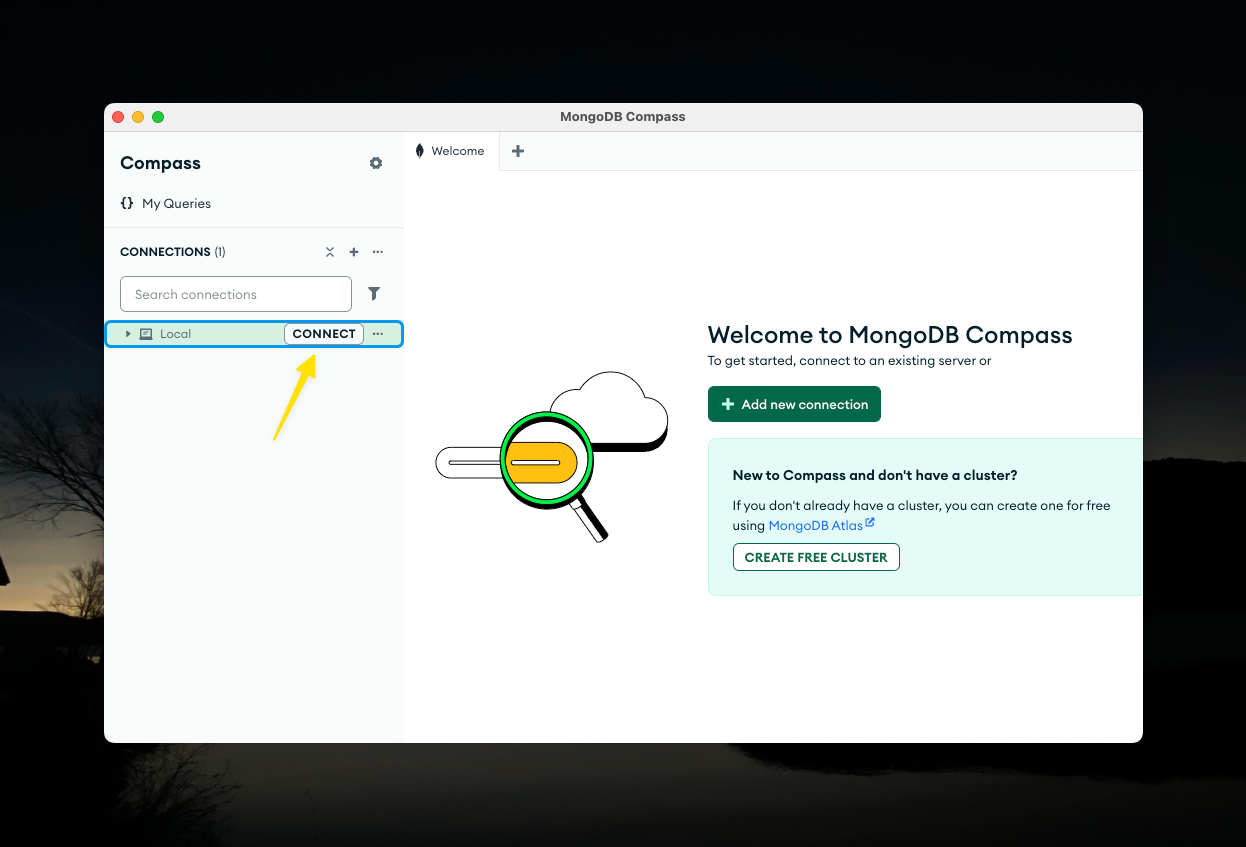
Ensure that compass is able to connect to your locally running MongoDB server.
-
Start the Compass program.
-
Click
CONNECT. -
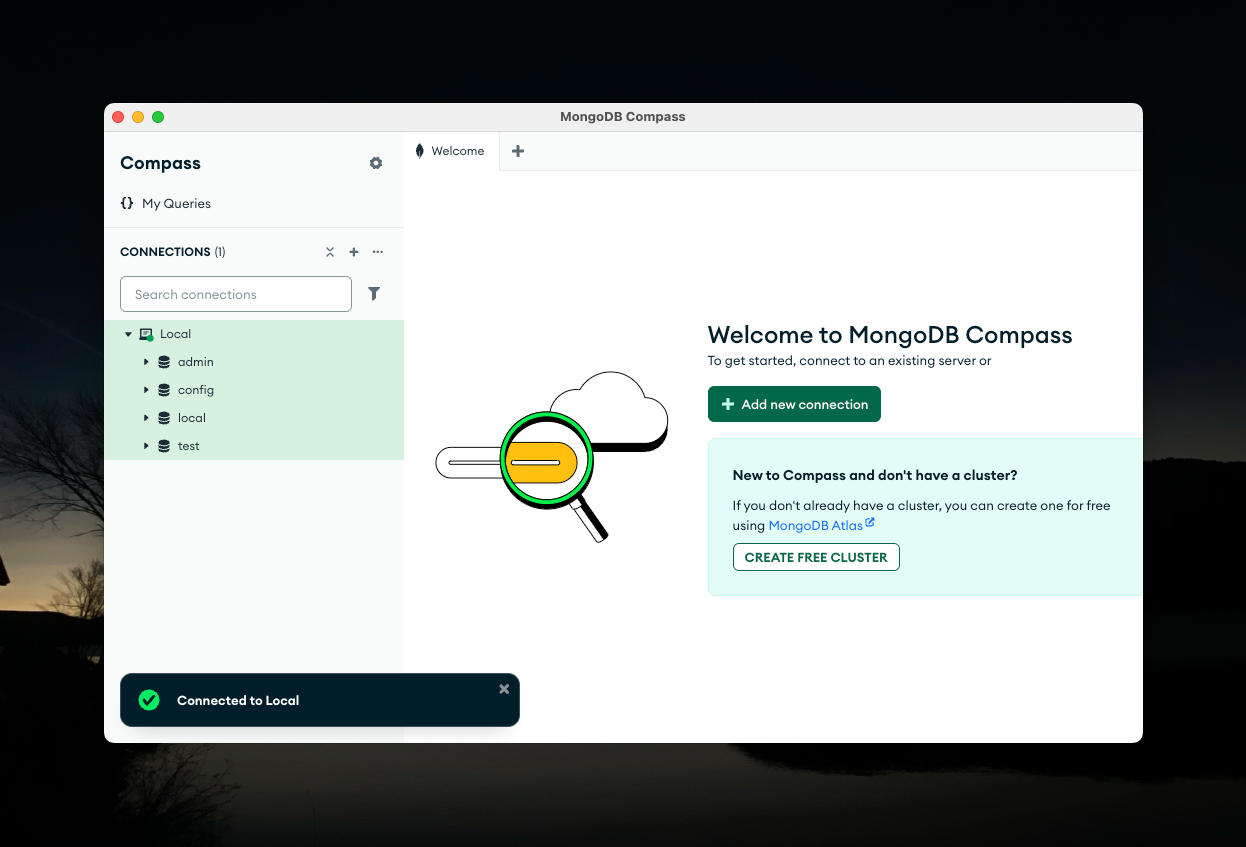
You should see a window similar to this:
-
Compass is ready to go!
What are the MongoDB executables?
Some of the MongoDB executables that were installed are listed and described below.
| Mongo executable | Use |
|---|---|
| mongosh | shell |
| mongod | server |
| mongodump | dump (backup) your work into .bson |
| mongoexport | Export data from MongoDB in CSV or JSON format. |
| mongoimport | Import CSV, TSV or JSON data into MongoDB. |
| mongorestore | restore a dump from .bson |
| mongostat | monitor basic MongoDB server statistics |
Setup Python for MongoDB
You need some additional software called a “driver” for MongoDB. They are programming language specific “glue” that allows your program to use MongoDB. We will be usng Python, so next you need to get that setup.
-
The driver is caled
PyMongo. It’s documentation page is here. The three step installation process is described on that page. Complete those three steps, but do not proceed on to the next page. - You identify the MongoDB instance to which you want to connect using a “connection string”. Since we’re NOT using MongoDB’s Atlas cloud service, the connection string we will use in our Python programs is defined in the
urivariable below:from pymongo import MongoClient ... uri = "mongodb://localhost:27017/" client = MongoClient(uri) ... -
So now we can test our python connection to MongoDB with the following program:
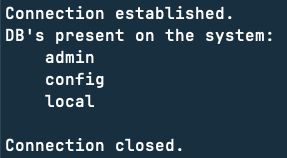
import pymongo uri = "mongodb://localhost:27017/" try: # initialize db connection connection = pymongo.MongoClient(uri) print("Connection established.") except pymongo.errors.ServerSelectionTimeoutError as err: print("Connection failure:") print(err) # Fetch list of all databases print('DB\'s present on the system:') dbs = connection.list_database_names() for dbn in dbs: print(' %s' % dbn) print("\nConnection closed.") -
If the program runs successfully, the result will look something like this:
- Congratulations! You are finished with setup!