21. Video processing
Background removal
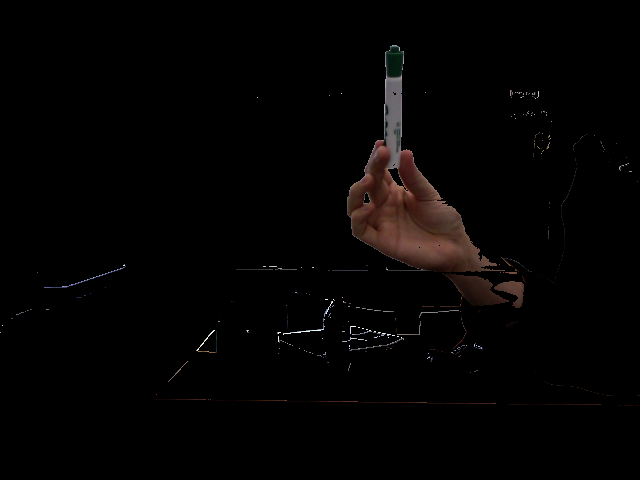
How can we make a webcam video, shot from the comfort of our room, look like we are standing on a beach? Filmmakers use the trick of filming in front of a green screen, and then replacing the green parts with the desired background footage. Since we don't happen to have a green screen here, we'll have to go a step further. What we'll do instead is first to take a snapshot of the background without us in it. Then for each frame, we'll get rid of that part of the image, replacing it with the corresponding part of the desired background. We know how to take a snapshot, so the only issue is getting rid of it. The approach taken in Shiffman Sec. 16.16 (example 16-12) is to compare a webcam pixel's r,g,b values with those of the corresponding background pixel, and see if they are too similar (using the dist() function) and remove them if so. In the following sketch, we implement a similar idea. [Do not expect a perfect result from this since we implement a very simple idea that does not work all the times.]
import processing.video.*;

Capture cam;

PImage back;              // background image
PImage fore;              // foreground image
var tolerance = 75;     // our color tolerance

function setup()
{
  createCanvas(640,480);
  smooth();
  cam = new Capture(this,640,480);
  cam.start();
  back = new PImage(cam.width,cam.height);
  back.loadPixels();
  fore = new PImage(cam.width,cam.height);
}

function draw()
{
  if (cam.available()) {
    cam.read(); cam.loadPixels();

    // pick a different selected color, if you want
    if(keyPressed && key== ' ') {
      back.copy(cam,0,0,cam.width,cam.height,0,0,cam.width,cam.height);
      back.loadPixels();
    }

    // create an image of the foreground that is transparent where the background is visible
    for(var y = 0; y < cam.height; y ++) {
      for(var x = 0; x < cam.width; x ++) {
        color c1 = cam.pixels[x+y*cam.width];
        color c2 = back.pixels[x+y*back.width];
        var d = dist(red(c1),green(c1),blue(c1),red(c2),green(c2),blue(c2));
        if(d < tolerance) fore.pixels[x+y*fore.width] = color(0);
        else fore.pixels[x+y*fore.width] = c1;
      }
    }
    fore.updatePixels();

    // draw the image and the color
    //image(cam,0,0);
    image(fore,0,0);
  }
}
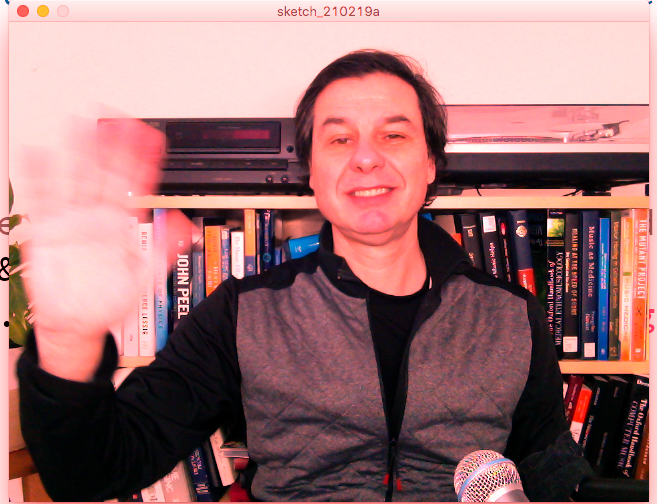
The same basic idea can be used to detect movement, by subtracting one frame from the next. Shiffman Sec. 16.7 discusses this approach and presents sketch 16-13. In the following, we present a similar cketch where we flash the screen red is lots of movement happens and where we automatically refresh the background image once in a while.
import processing.video.*;

Capture cam;

PImage back;              // background image
var tolerance = 0.1;    // percent of the image different

function setup()
{
  createCanvas(640,480);
  smooth();
  cam = new Capture(this,640,480);
  cam.start();
  back = new PImage(cam.width,cam.height);
  back.loadPixels();
}

function draw()
{
  if (cam.available()) {
    cam.read(); cam.loadPixels();

    // create an image of the foreground that is transparent where the background is visible
    var f = 0;
    for(var y = 0; y < cam.height; y ++) {
      for(var x = 0; x < cam.width; x ++) {
        color c1 = cam.pixels[x+y*cam.width];
        color c2 = back.pixels[x+y*back.width];
        f += dist(red(c1),green(c1),blue(c1),red(c2),green(c2),blue(c2));
      }
    }
    f /= cam.width*cam.height*255;

    // update the background is movement was detected or keypressed
    if(f > tolerance || (keyPressed && key== ' ')) {
      back.copy(cam,0,0,cam.width,cam.height,0,0,cam.width,cam.height);
      back.loadPixels();
    }

    // draw the image and the color
    if(f > tolerance) tint(255,128,128);
    else tint(255);
    image(cam,0,0);
  }
}
Color tracking
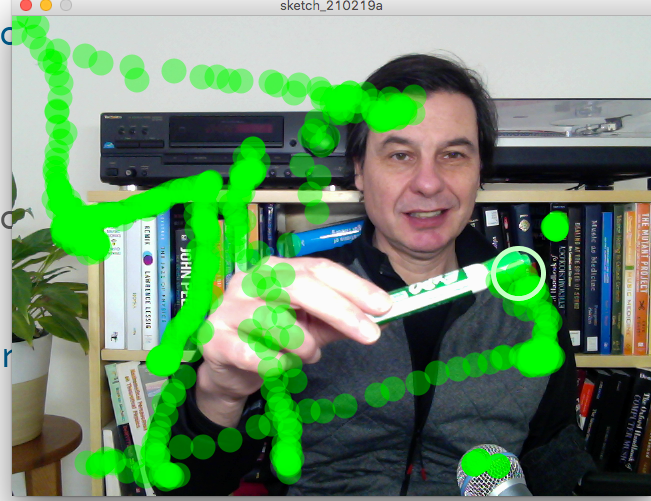
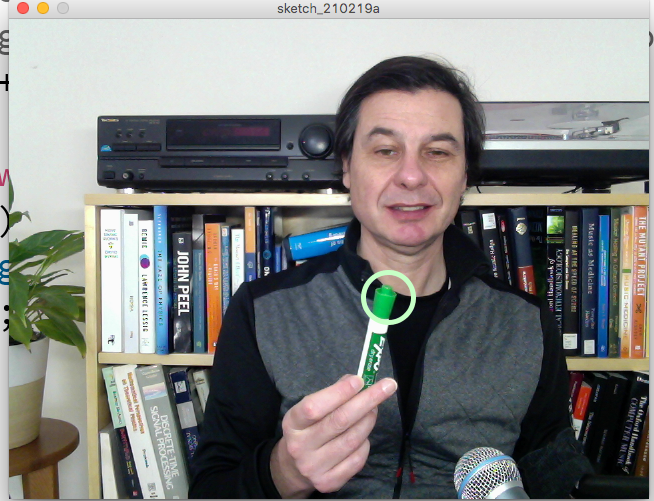
We can use video as a form of user input. The Processing example Libraries | Video (Capture) | BrightnessTracking demonstrates how to find a bright spot (e.g., from a flashlight). We can modify this a bit to allow tracking on a fixed color, as in Shiffman ec. 16.5 (see example 16-11). In the following sketch, I implemented the same idea, while also allowing the selected color to be changed by the mouse. To find the closest pixel to a given color in a frame, we check all pixels to see which one is closest to a given color. In this sketch, we simply draw an ellipse around the point.
import processing.video.*;

Capture cam;

color selected = color(0,255,0); // selected color

function setup()
{
  createCanvas(640,480);
  smooth();
  cam = new Capture(this,640,480);
  cam.start();
}

function draw()
{
  if (cam.available()) {
    cam.read(); cam.loadPixels();

    // pick a different selected color, if you want
    if(mouseIsPressed) selected = cam.pixels[mouseX+mouseY*cam.width];

    // search for the pixel closer to the selected color
    var sx = 0, sy = 0; // selected position
    var minDist = 1000; // put a huge number so we do not have to care
    for(var y = 0; y < cam.height; y ++) {
      for(var x = 0; x < cam.width; x ++) {
        color c = cam.pixels[x+y*cam.width];
        var d = dist(red(c),green(c),blue(c),
                       red(selected),green(selected),blue(selected));
        if(d < minDist) { minDist = d; sx = x; sy = y; }
      }
    }

    // draw the image and the color
    image(cam,0,0);
    noFill(); stroke(200,255,200); strokeWeight(5);
    ellipse(sx,sy,50,50);
  }
}
We can make this a bit more exciting, but drawing on the screen with the selected color. This basically uses a webcam to let us paint with objects in the real world. To accomplish this, we also have to intruduce a new object called The PGraphics that we create using the createGraphics() function. This object allows us to call all the drawing functions we used (e.g. ellipse, rect, fill, stroke, etc.), but update the image "contained" in that object, instead of the screen. This allows us to draw onto this surface and than plce it on top of our camera.
import processing.video.*;

Capture cam;
PGraphics img;

color selected = color(0,255,0); // selected color

function setup()
{
  createCanvas(640,480);
  smooth();
  cam = new Capture(this,640,480);
  cam.start();
  img = createGraphics(640,480,JAVA2D);
}

function draw()
{
  if (cam.available()) {
    cam.read(); cam.loadPixels();

    // pick a different selected color, if you want
    if(mouseIsPressed) selected = cam.pixels[mouseX+mouseY*cam.width];

    // search for the pixel closer to the selected color
    var sx = 0, sy = 0; // selected position
    var minDist = 1000; // put a huge number so we do not have to care
    for(var y = 0; y < cam.height; y ++) {
      for(var x = 0; x < cam.width; x ++) {
        color c = cam.pixels[x+y*cam.width];
        var d = dist(red(c),green(c),blue(c),
                       red(selected),green(selected),blue(selected));
        if(d < minDist) { minDist = d; sx = x; sy = y; }
      }
    }

    // update the painted image
    img.beginDraw();
    img.smooth();
    img.fill(selected,100); img.noStroke();
    img.ellipse(sx,sy,25,25);
    img.endDraw();

    // draw the cam image and on top of that draw the painted image
    image(cam,0,0);
    image(img,0,0);
    noFill(); stroke(200,255,200); strokeWeight(5);
    ellipse(sx,sy,50,50);
  }
}

function keyPressed() {
  // clear
  if(key == ' ') img = createGraphics(cam.width,cam.height,JAVA2D);
}