7. Basic Motion
Linear motion
We've done plenty of random wandering, so now let's have some direction to our movement. As with the random wanderer, we'll keep the position in variables called x and y. Then if we just want to move horizontally, we simply increment x by 1 each frame.
var x, y; // The current coordinates of the ball
var r = 20; // ball radius

function setup()
{
  createCanvas(400,400);
  smooth();
  noStroke();

  x = 0; y = height/2;   // start at left, center
}

function draw()
{
  background(0);
  ellipse(x,y,2*r,2*r);

  x += 1;  // take one step to the right
}
To move the ball in a different direction or with a different speed, we simply increment x and y by the x and y coordinates of the velocity of the ball. Also, we can make sure that the ball will not exit the screen by constraining its center to be in the screen coordinates.
var x, y; // The current coordinates of the ball
var r = 20; // ball radius
var vx=1, vy=1; // ball velocity

function setup()
{
  createCanvas(400,400);
  smooth();
  noStroke();

  // print instructions
  println("x/X: de/increase x step createCanvas");
  println("y/Y: de/increase y step createCanvas");
  println("c: go to center of window");

  x = width/2; y = height/2; // start at the center
}

function draw()
{
  background(0);
  ellipse(x,y,2*r,2*r);

  // take a step
  x += vx; y += vy;
  // stay on screen
  x = constrain(x,0,width);
  y = constrain(y,0,height);
}

function keyPressed()
{
  if (key=='x') vx--;
  else if (key=='X') vx++;
  else if (key=='y') vy--;
  else if (key=='Y') vy++;
  else if (key=='c') {
    x = width/2;
    y = height/2;
  }
  println("velocity: "+vx+","+vy);
}
Bouncing
To make the ball bounce off the wall, instead of stropping abruptly, we first check whether it has exited by comparing its coordinates with the ones we would get after constraining (this is another use for this function). Note that here we include the radius of the ball since we want to make it look like the outside of the ball is hitting the wall. If we hit, then we first constrain the ball position has before and second we flip the direction of the velocity to go back the other way.
var x, y; // The current coordinates of the ball
var r = 20; // ball radius
var vx, vy; // ball velocity

function setup()
{
  createCanvas(400,400);
  smooth();
  noStroke();

  x = width/2; y = height/2; // start at the center
  vx = random(-5,5); vy = random(-5,5); // start in random direction
}

function draw()
{
  background(0);
  ellipse(x,y,2*r,2*r);

  // take a step
  x += vx; y += vy;

  // bounce if getting offscreen
  if(x != constrain(x,r,width-r)) {
    x = constrain(x,r,width-r); // constrain position
    vx = -vx;                   // flip velocity
  }
  if(y != constrain(y,r,width-r)) {
    y = constrain(y,r,width-r); // constrain position
    vy = -vy;                   // flip velocity
  }
}
Following
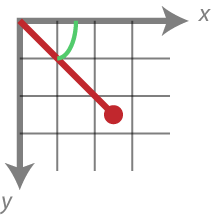
Now let's suppose we want to move from the current position toward a target, say wherever the mouse is. To do so, we can calculate the differences is the x coordinates (mouseX - x) and y coordinates (mouseY - y), and take a step that's some fraction of that; this fraction is the speed of the ball. If the fraction is 1, it goes right to the target; if it's smaller, it goes only part of the way. Here is a sketch based on the Processing example Basics | Input | Easing.
var x = 0, y = 0; // The current coordinates of the ball
var r = 20; // ball radius
var easing = 0.05; // how quickly the ball catches up

function setup()
{
  createCanvas(400,400);
  smooth();
  noStroke();
}

function draw()
{
  background(0);
  fill(255);
  ellipse(x,y,2*r,2*r);
  fill(128);
  ellipse(mouseX,mouseY,r/2,r/2);

  // take a step
  var vx = (mouseX - x) * easing;
  var vy = (mouseY - y) * easing;
  x += vx; y += vy;
}
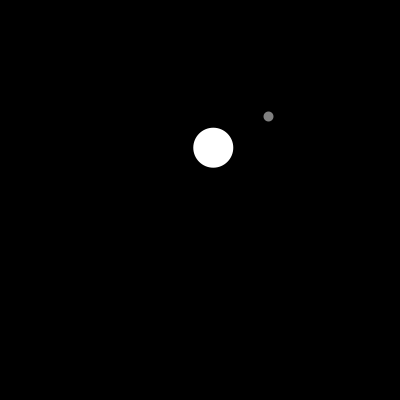
Notice that the follower slows down as it approach the target. To explain that, let us suppose that the "speed" fraction is 1/2. Then the first frame it the follower moves halfway to the target, the next frame it moves half of what's left (or 1/4 of the original distance), the next frame it moves half of what's still left (1/8 of the original), etc.
Periodic motion
Sinusoids oscillate between -1 and 1, as the angle goes from 0 to 360 degrees. A sketch by Greenberg, modified here, illustrates.
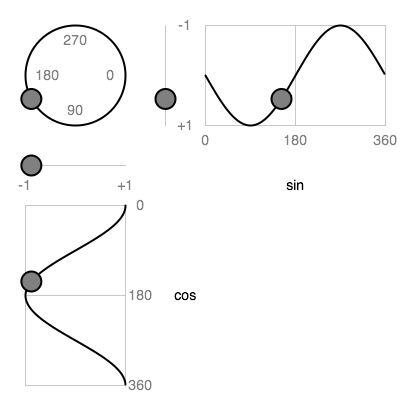
The top curve is a sine and the bottom a cosine. Note that this might look upside down, since the y axis increases from top to bottom here.
Recall from math class that when a point on a unit circle (centered at the origin, with radius 1) is at a particular angle, its x coordinate is the cosine of that angle, while its y coordinate is the sine of that angle. You can see that in the above sketch, viewing the top curve as the y coordinate and the bottom curve as the x coordinate of the ball moving around the circle.
Processing provides the sin() and cos() functions to compute sines and cosines. They expect their parameters to be in radians (where 2π is 360 degrees); we can convert from degrees to radians with the radians() function. Since π is at the heart of radians, and you might not have it memorized, Processing provides PI (180 degrees), TWO_PI (360 degrees), and HALF_PI (90 degrees).
This makes it easy to generate circular behavior. The state is the angle, and we use sine and cosine to compute the coordinates. The coordinates are centered at (0, 0), and the radius of the circle is 1. Thus we multiply the sine and cosine by the desired radius to make the circle bigger (10 in the following example), and we add in values for where we want the center to be (mouse position in the example).
var angle = 0;

function setup()
{
  createCanvas(300,300);
  background(0);
  smooth();
  noStroke();
}

function draw()
{
  fill(0,10);
  rect(0,0,width,height);
  fill(255);
  ellipse(mouseX+10*cos(angle), mouseY+10*sin(angle), 10,10);
  angle += radians(5);   // 5 degree increments
}
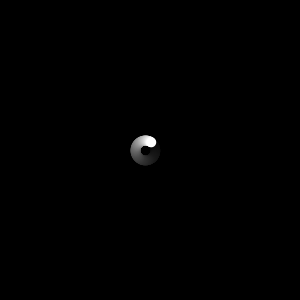
Doing a fade-away here gives a very interesting effect; give it a try.
We can also make the radius vary. If the radius gets incrementally bigger, we'll have a spiral. The following sketch spirals away from the mouse press.
var x,y;   // center of circle
var angle=0, radius=0;    // spiral around center

function setup()
{
  createCanvas(300,300);
  background(0);
  smooth();
  noStroke();
}

function draw()
{
  fill(0,10);
  rect(0,0,width,height);
  fill(255);
  ellipse(x+radius*cos(angle), y+radius*sin(angle), 10,10);
  angle += radians(5);   // 5 degree increments
  radius += 0.2;
}

function mousePressed()
{
  x = mouseX; y = mouseY;
  angle = 0;
  radius = 0;
}

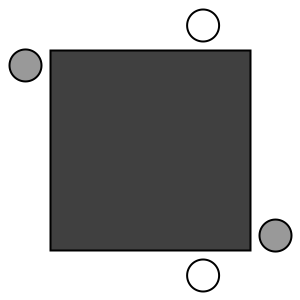
Since the value of a sine/cosine oscillates between -1 and 1, we can use it to make objects move back and forth or up and down. As discussed above, we multiply by some number to make it oscillate between plus/minus that number, and we add in another number to make it oscilate by a given amount around that number. The following sketch is a simplified version of the Processing example Basics | Math | SineCosine.
// Simplified from Processing example Basics | Math | SineCosine

var angle=0, da=0.1;
var rectSize = 200;
var offset = 25;

function setup()
{
  createCanvas(300, 300);
  strokeWeight(2);
  smooth();
  rectMode(CENTER);
}

function draw()
{
  background(255);

  fill(64);
  rect(width/2, height/2, rectSize, rectSize);

  fill(255);
  ellipse(width/2 + rectSize/2*cos(angle), height/2-rectSize/2-offset, 32, 32);
  ellipse(width/2 + rectSize/2*cos(-angle), height/2+rectSize/2+offset, 32, 32);

  fill(153);
  ellipse(width/2+rectSize/2+offset, height/2 + rectSize/2*sin(angle), 32, 32);
  ellipse(width/2-rectSize/2-offset, height/2 + rectSize/2*sin(-angle), 32, 32);

  angle += da;
}
We can similarly use the value to control other things we want to oscillate, such as size or color. For example, for size to vary between 0 and 20, we'd want to scale the sine by 10 (so it goes -10 to +10) and then add 10 to it. Give it a try.