8. Iteration
Loops
Suppose we wanted to draw a row of a set of circles from left to right across the screen. Here's a simple way to do that:
function setup(){
    createCanvas(200,200);
    ellipse(  0,100,25,25);
    ellipse( 50,100,25,25);
    ellipse(100,100,25,25);
    ellipse(150,100,25,25);
    ellipse(200,100,25,25);
}
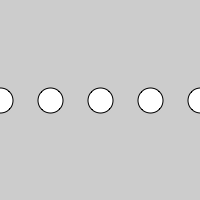
This approach suffers from several problems. First, to change the numner of circles, we have have to manually add and remove some. Second, it's pretty silly to type almost the same code again and again, with just a minor variation. This would become much more cumbersome if we ere to type something more complex that a circle (functions would help a bit, but some repetition would still occur).
A programming construct called a "loop" helps us out. A loop executes a particular piece of code again and again, until some condition tells it to stop. For the circles example, we could use a variable to keep track of where to put the next circle, and on each iteration, draw the circle and advance to the next position. Here's how to do that using a while loop (as usual, see the Programming notes for syntax details).
function setup(){
    createCanvas(200,200);
    var x = 0;  // initial value
    while (x <= 200) {  // keep going as long as this is true
        ellipse(x,100,25,25);  // do something for this iteration
        x = x+50;  // update for next iteration
    }
}

If we "unroll" the loop, it's essentially doing the following:
function setup(){
    var x = 0;

    // First iteration: x = 0 <= 200 so continue
    ellipse(x,100,10,10);
    x = x+50;

    // Second iteration : x = 50 <= 200 so continue
    ellipse(x,100,10,10);
    x = x+50;

    // Third iteration : x = 100 <= 200 so continue
    ellipse(x,100,10,10);
    x = x+50;

    // Fourth iteration : x = 150 <= 200 so continue
    ellipse(x,100,10,10);
    x = x+50;

    // Fifth iteration : x = 200 <= 200 so continue
    ellipse(x,100,10,10);
    x = x+50;

    // Now x = 250 > 200 so stop
}
We see three main parts to the loop: (1) initialize variables before the start of the loop; (2) test a boolean condition each iteration, to see whether to continue; (3) perform the body of the loop as long as the condition is true. Typically the body contains some way to make progress (here, incrementing x by 50), so that the test will eventually be false. Try out variations of the loop above to get a feeling as to what happens.
There's an alternative way to express loops, called a for loop, that brings together in a single line the initialization, continuation test, and update. Here's the stepping stone sketch written that way.
function setup(){
    createCanvas(200,200);
    smooth();

    for (var x = 0; x <= 200; x = x+50) {
        ellipse(x,100,25,25);
    }
}

Here are some other examples of using loops to create various effects. Try your own variations on how to loop and what to do inside the loop.
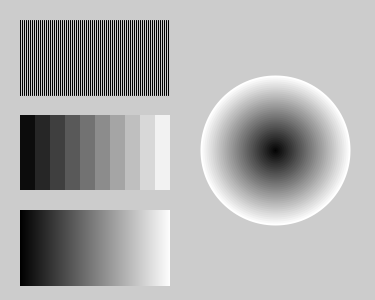
function setup(){
    createCanvas(375,300);
    var o = 20; // offset between the examples
    var ox = o, oy = o; // current offset
    var s = 150; // size of the rect loops

    // Sets of thin lines and circles
    noFill();
    for (var x=0; x<s; x+=2) {
        line(x+ox, oy, x+ox, oy+s/2);
    }
    oy += o+s/2; // advanced to next drawing

    // Steps -- change color with position (R&F 6-04)
    noStroke();
    for (var x = 0; x<s; x+=s/10) {
        fill(255*(x+0.5*s/10)/s);
        rect(x+ox, oy, s/10, s/2);
    }
    oy += o+s/2; // advanced to next drawing

    // Steps -- change color with position (R&F 6-04)
    noStroke();
    for (var x=0; x<s; x++) {
       stroke(255*x/s);
       line(x+ox, oy, x+ox, oy+s/2);
    }

    // Circular gradient
    noStroke();
    for(var r = s; r > 0; r -= 4) {
        fill(255*r/s);
        ellipse(2*s-25,height/2,r,r);
    }
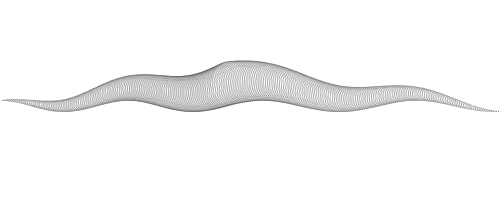
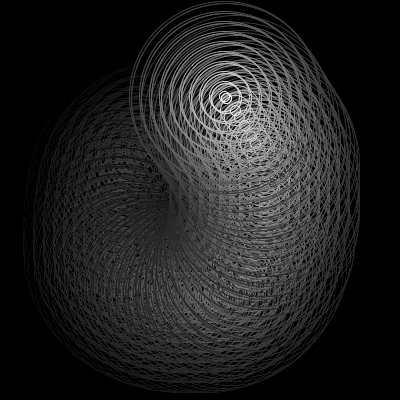
One last example of what we can do by varying the aspects of a loop, based on Greenberg (10-7). To draw a worm, we loop down its body, drawing an ellipse for each segment. The ellipses grow and shrink, and their centers move sinusoidally.
// inspired by Greenberg
function setup(){
    createCanvas(500, 200);
    smooth(); noFill(); background(255);
    stroke(0); strokeWeight(.2);

    var dx=2;
    var da=radians(2.55);  // converting x to angle for sine
    var radius=0, dr=0.35; // worm segment size and step
    var x=0, y=height/2;
    while (x<width) {
        ellipse(x-radius/2, y-radius/2, radius*.75, radius);
        x += dx;
        y += 0.5*sin(x*da);
        radius += dr;
        if (x==width/2) dr*=-1;   // start shrinking segments
    }
}
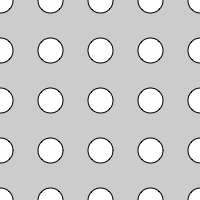
Loops of loops
There is nothing that prevents us for looping inside a loop. This can be helpful to make grids of things by looping over x, and for each of those, looping over y. Here is a simple example (more in the coming lectures).
function setup(){
    createCanvas(200,200);
    for (var x = 0; x <= 200; x = x+50) {
        for (var y = 0; y <= 200; y = y+50){
            ellipse(x,y,25,25);
        }
    }
}
Interaction
All the loops so far have been in static sketches. As with other sketches involving multiple elements, all the elements produced by a loop appear simultaneously. This can be contrasted with motion sketches where, for example, we would make a ball move across the screen step by step, perhaps even at the same spacing as in the loops. In that case, the draw() body is essentially doing a loop, with each frame being one iteration, drawn at a separate tick.
We can of course use a loop inside the draw() body (and it's still the case that all elements appear at once). Shiffman 6-9 provides one example, in which vertical rectangles are drawn, with fill color set by distance from the mouse. The following variation works with circles.
function setup()
{
  createCanvas(400,400);
  smooth();
  background(0);
}

function draw()
{
  // Fade away
  fill(0,5);
  noStroke();
  rect(0,0,width,height);

  // Circles surrounding mouse position
  noFill();
  for (var d=10; d<200; d+=20) {
    stroke(255-d);
    ellipse(mouseX,mouseY, d,d);
  }
}
As another example, we can draw a bunch of random points near the mouse press, for a spraypaint-like effect. Note the use of the dist() call to make sure that the points are in a circle; else the brush is a square.
var num=100;         // how many points
var sz=10;           // how big an aerosol

function setup()
{
  createCanvas(400,400);
  smooth();
  background(0);
  noFill();
  stroke(255);
}

function draw()
{
  if (mouseIsPressed && (mouseX != pmouseX || mouseY != pmouseY)) {
    for (var i=0; i<num; i++) {
      // Generate point
      var x = mouseX+random(-sz,sz);
      var y = mouseY+random(-sz,sz);
      // Is it in the circle
      if (dist(x,y,mouseX,mouseY) < sz) {
        point(x, y);
      }
    }
  }
}

function keyPressed()
{
  if (key=='S') {   // bigger size
    if (sz<100) sz++;
  }
  else if (key=='s') {
    if (sz>0) sz--;
  }
  else if (key=='P') {   // more points
    if (num<1000) num+=10;
  }
  else if (key=='p') {
    if (num>10) num-=10;
  }
}

Programming notes
- While loop
- A while loop has the form
The initialization says what to do before the loop starts. One common initialization step is to declare and initialize a variable that will count how far through the loop we've gone, e.g., "int i=0". By convention, such loop counters are often named "i" and "j". The update is an expression that is intended to make progress through the loop, e.g., "i++". The continuation test is a boolean expression that is tested before conducting the next iteration of the loop, e.g., "i < num". If it is true, the loop body is executed (again), else it is terminated.
initialization while (continuation test) { statements, typically including update } - For loop
- A for loop has the form
The initialization says what to do before the loop starts. It can include multiple steps (separated by commas), but that can get a bit confusing to read. One common initialization step is to declare and initialize a variable that will count how far through the loop we've gone, e.g., "int i=0". By convention, such loop counters are often named "i" and "j". The update is an expression that is intended to make progress through the loop, e.g., "i++". It is performed after the statements in the body of the loop, and before the continuation test. The continuation test is a boolean expression that is tested before conducting the next iteration of the loop, e.g., "i < num". If it is true, the loop body is executed (again), else it is terminated. Any of these parts can be empty; the semicolons must still be there.
for (initialization; continuation test; update) {
  statements
}
Variables declared in a loop initialization are useable only within the loop (and can likewise be reused elsewhere without conflict). Variables can be declared within the body of a loop or a conditional, and are local to that block of code. One way to think about it is as if the variables "live" only within the curly braces where they are declared.