**Final Report**
Student 1 Ziyi Zhou (F006H4G) and Student 2 Ziyuan Zhou (F006GMR)
# Motivation and Understanding of the Theme
This year's theme is "Coloring outside the lines".
Fitting its literal meaning, we have chose the aurora to be our main subject of the scene.
Aurora is colorful and beautiful, and it is also a phenomenon that happens outside the lines of the Earth's magnetic field.
This phrase also has a meaning of breaking the rules.
So, to break the rule, we have rendered a short video instead of a still image.
# Proposed Features
Features we implemented in our final project:
* Depth of field.
* Normal mapping.
* Different light sources.
* Environment map emitter with importance sampling.
* Participating media path tracer.
* Photon mapping, final gathering and progressive photon mapping.
* Volumetric photon mapping.
* Parallel rendering.
## Basic Features
We implements some basic features before.
But after multi-times version iteration, we want to make sure it can still work properly.
### Depth of Field
### Normal Mapping
### Different light sources
* the Beam Light: Control the cos range as a diffuse light, which is hard for Mats tracer.
* the Project Light: Return color only in the vaild range of cosine and the uv has non-zero value. This is pretty useful to project colorful aurora on the sky, which we will discuss later.
## Advanced Features
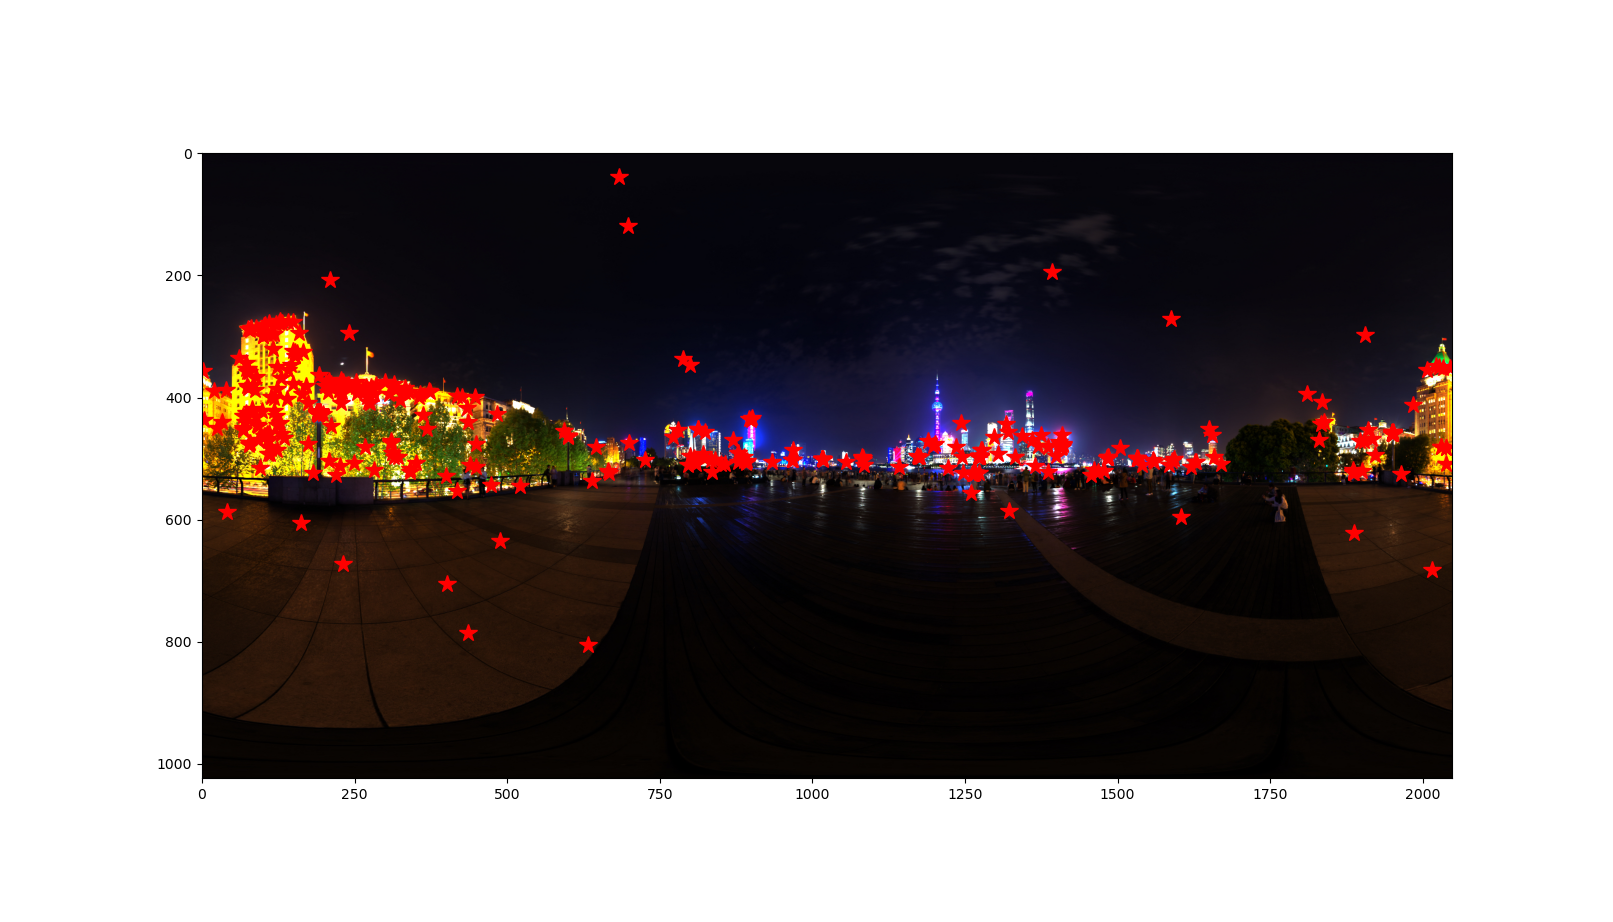
### Environment Map Emitter with Importance Sampling
It is easy if we only want to show an image as a background.
But if we need the background to serve as a light source,
we need to treat the background as an emitter surface and sample the environment map with importance sampling.
### Participating Media Path Tracer
Our path tracer support homogeneous participating media.

We found it hard to to decide when to sample free flight (i.e. when the ray hit the material).
For convinence, I put the initialized medium into the integrator.
And each surface has a medium insde and a medium outside.
When the light hit something specular, which means they have a chance to change medium.
This is detected by $dot(wi, n)*dot(n, wo)$, when this equation is greater 0,
it means the ray continues going on, we need to check if it change the medium.
We do this by shifting: when it equals to inside medium,
we change it to outside medium, and vice versa.

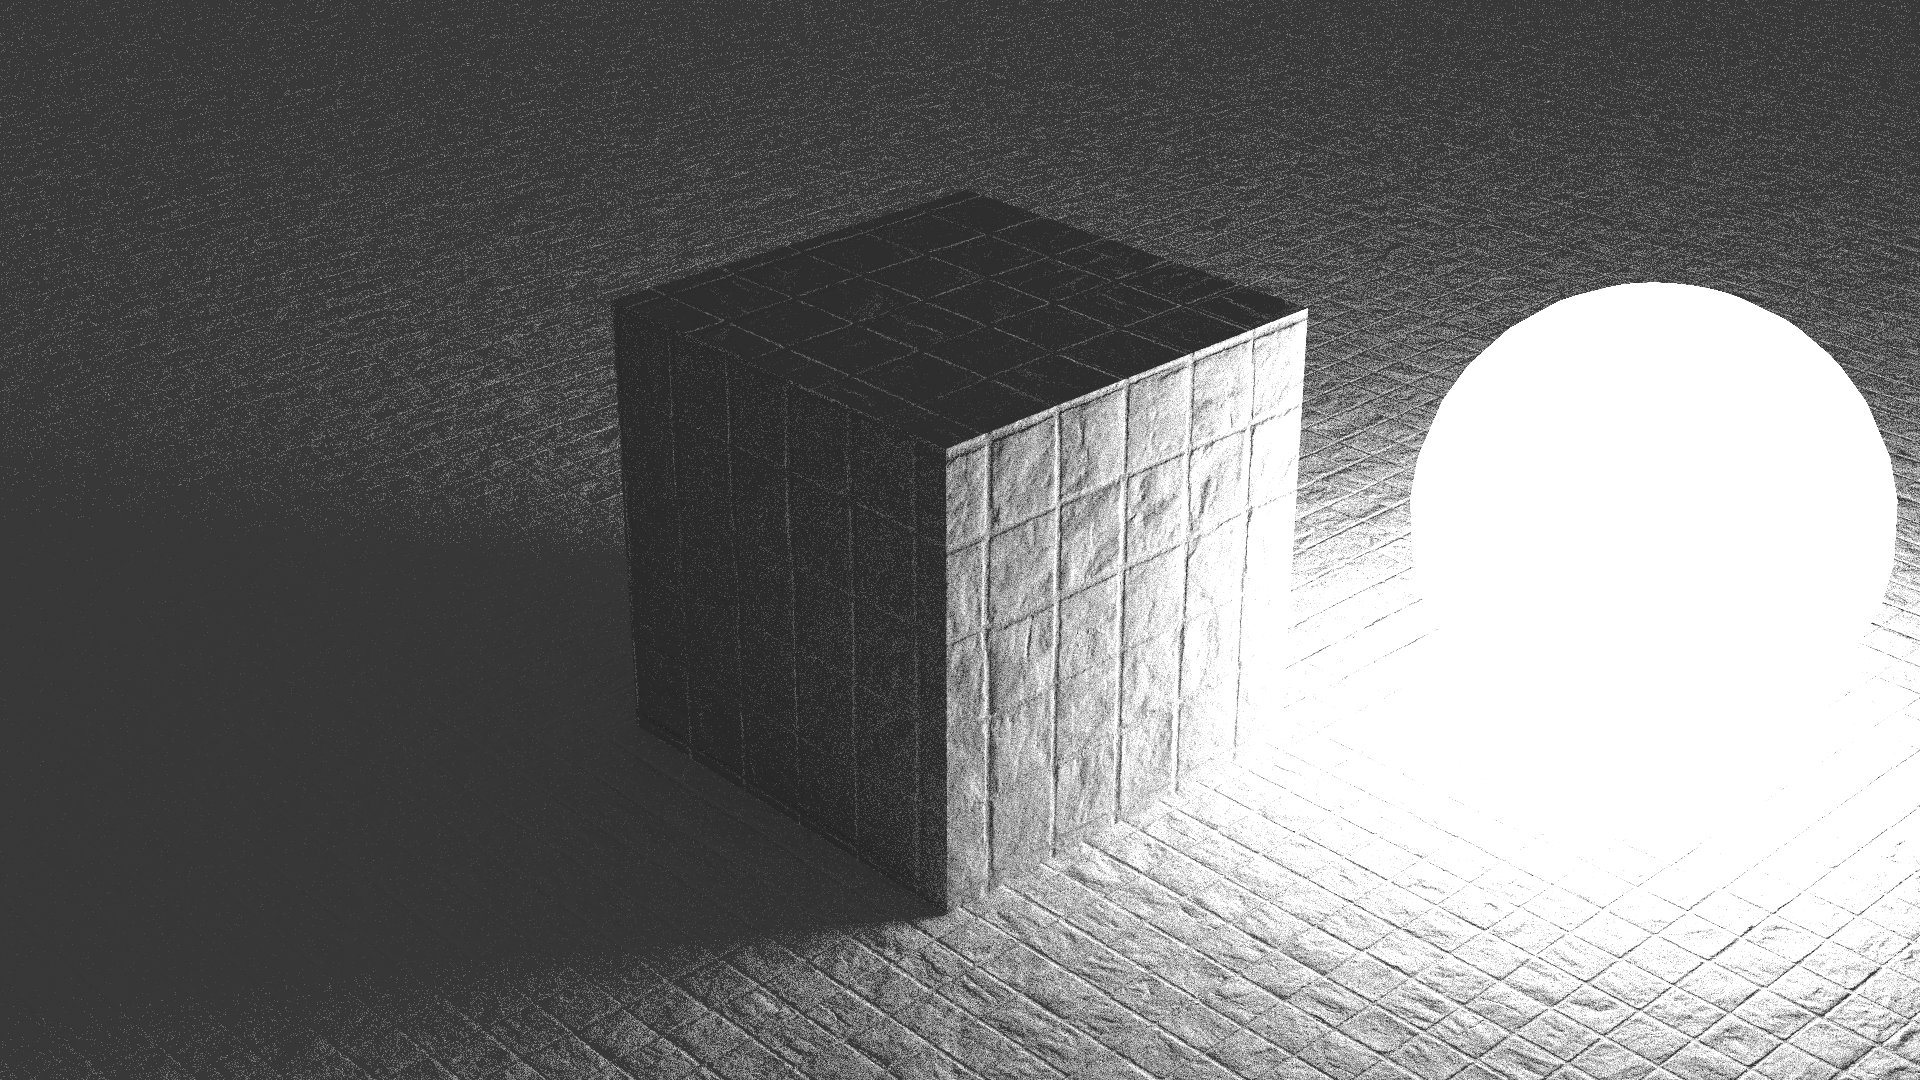
### Photon Mapping, Final Gather, Progressive Photon Mapping
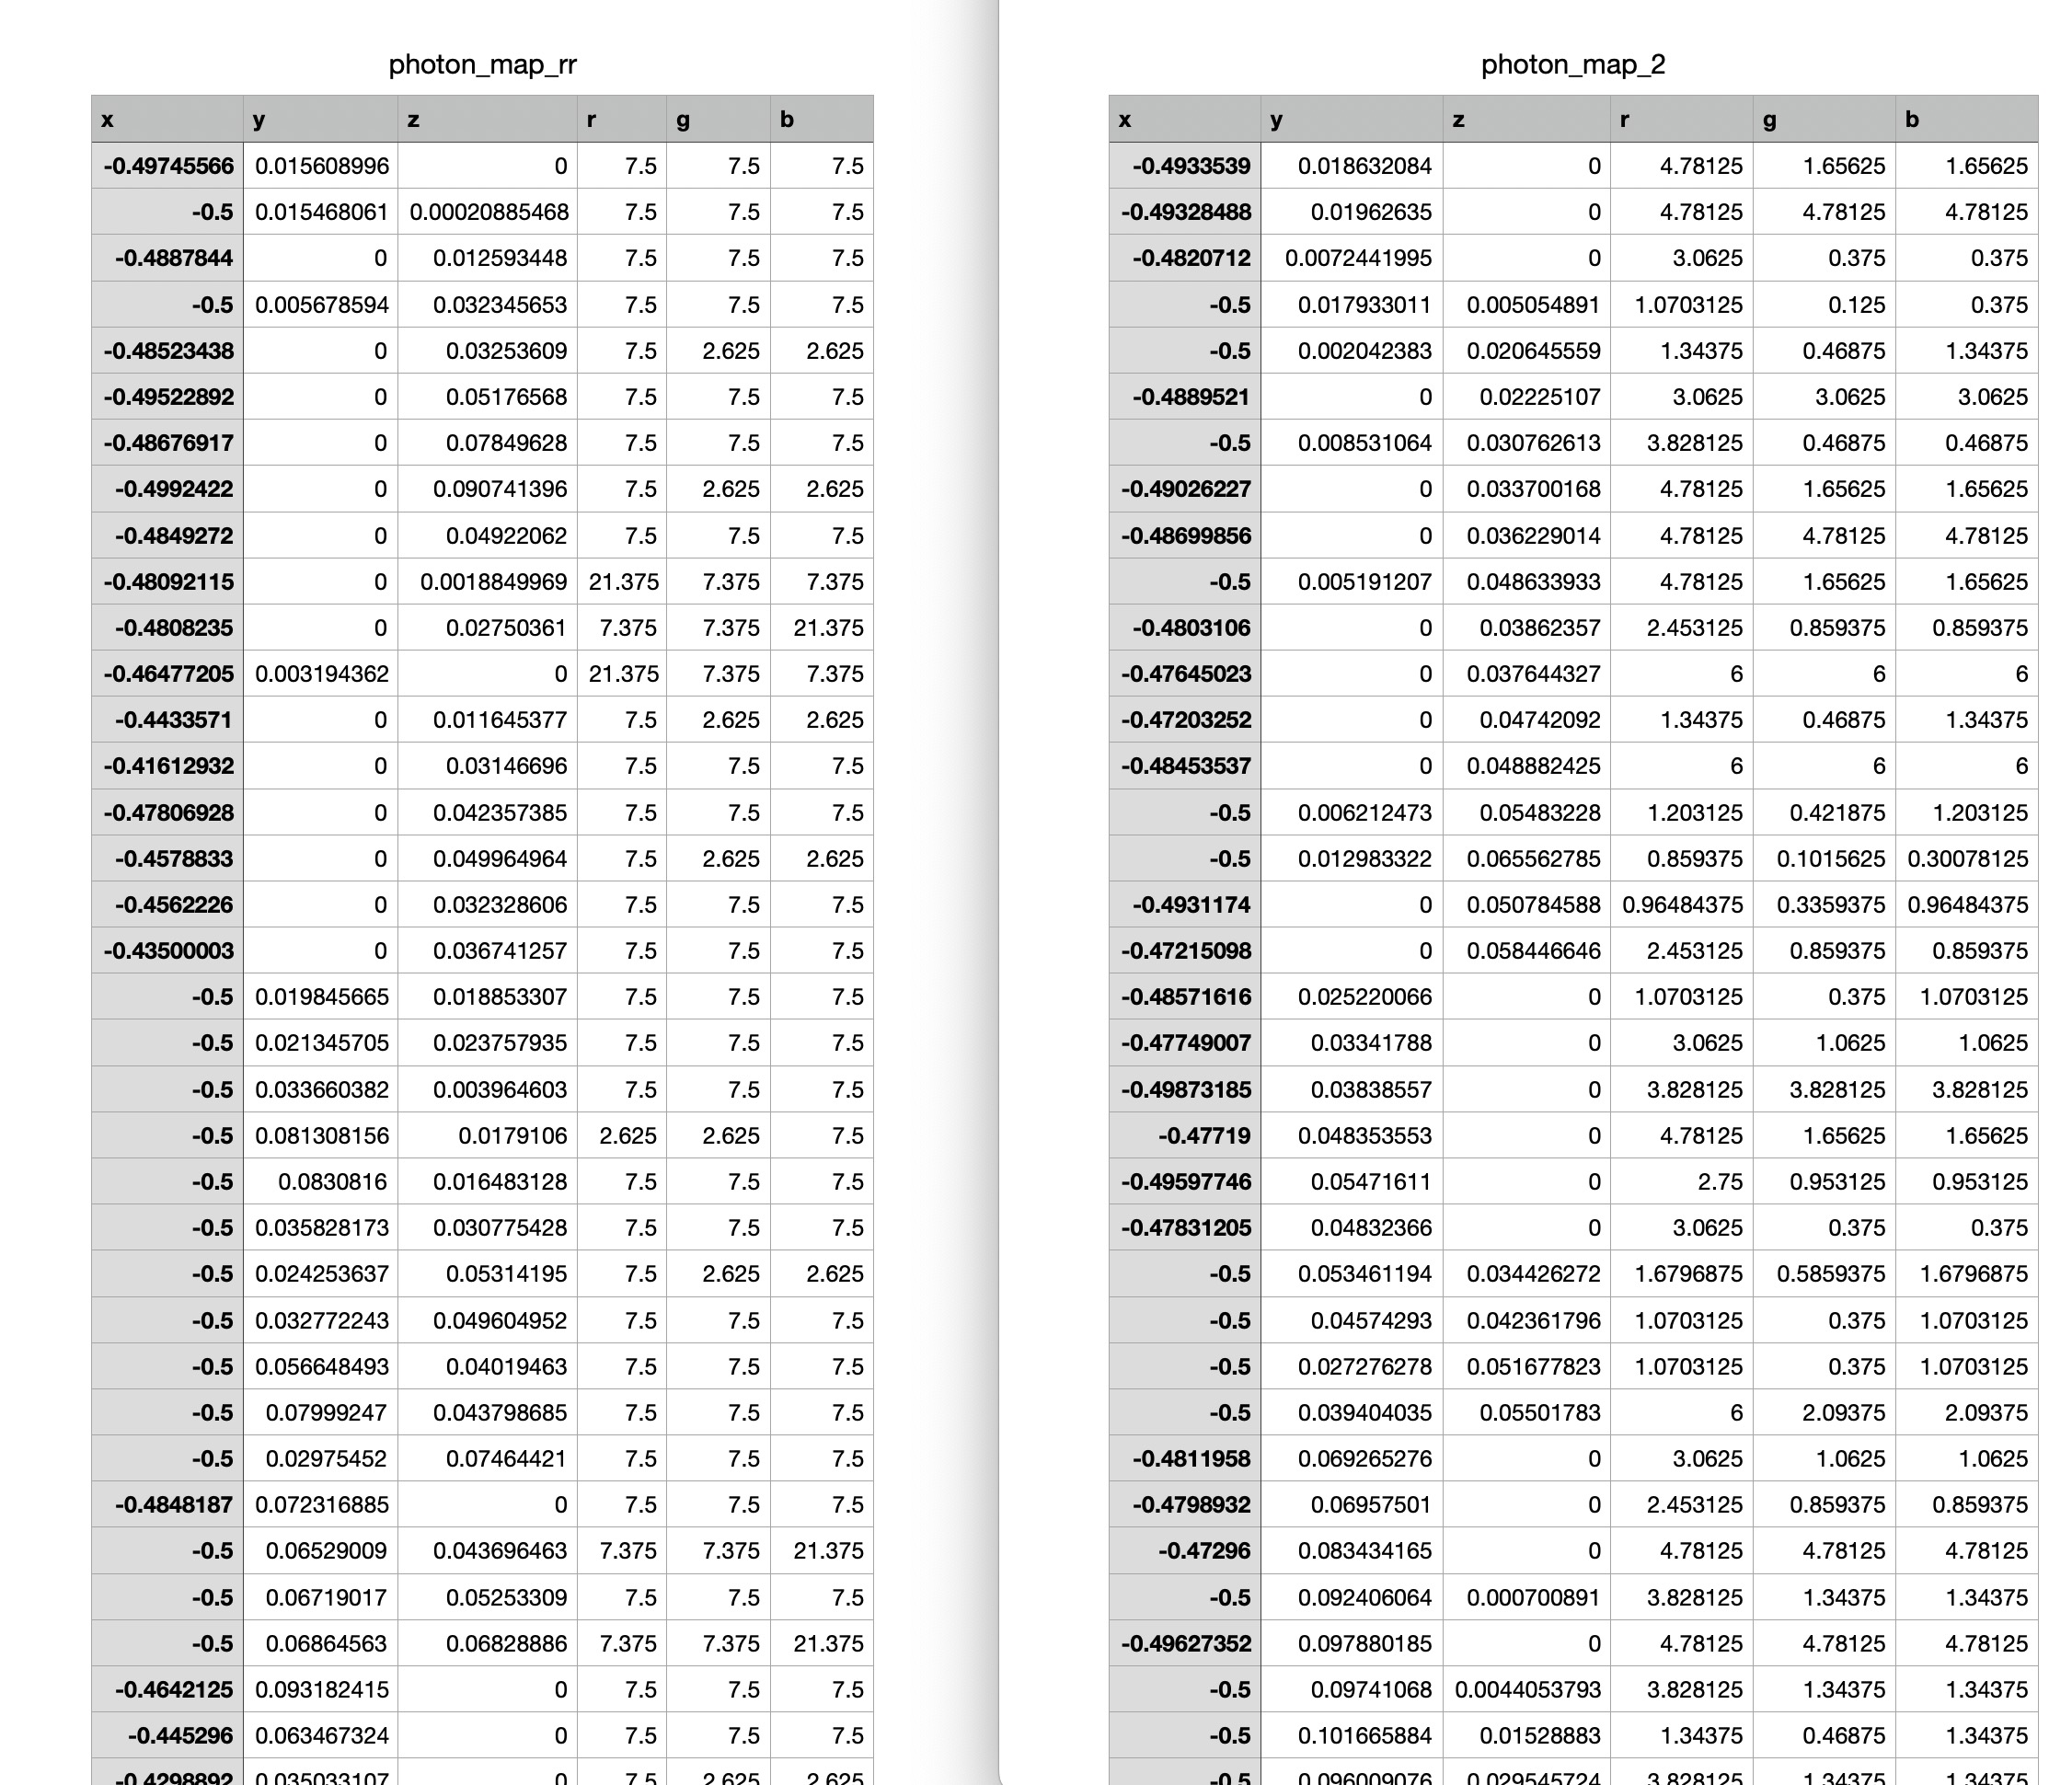
We first implemented surface photon mapping.
Photon mapping is a challenge
We chose photon mapping as our integrator because it can handle it pretty well when scenes have limited light sources.
It can produce relatively good results with a small number of photons and it is much faster than other integrators.
We use Russian Roulette to decide when to stop tracing a photon to keep each photon with roughly the same power.
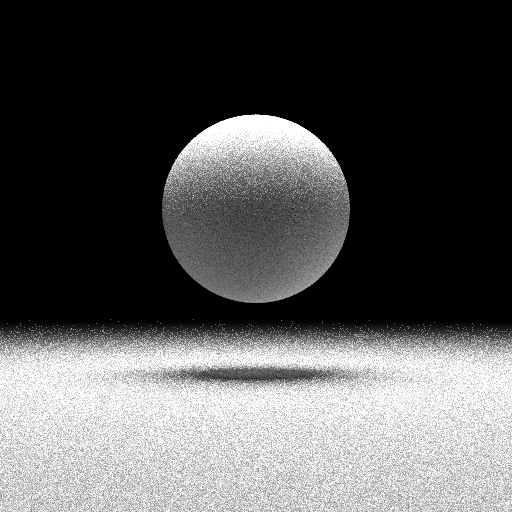
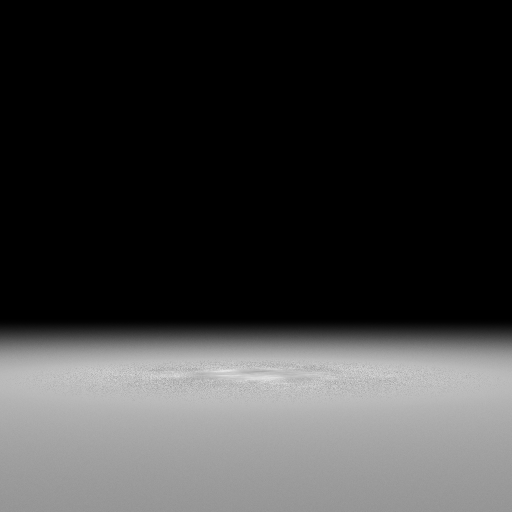
To verify this, we output the photon map as shown below.
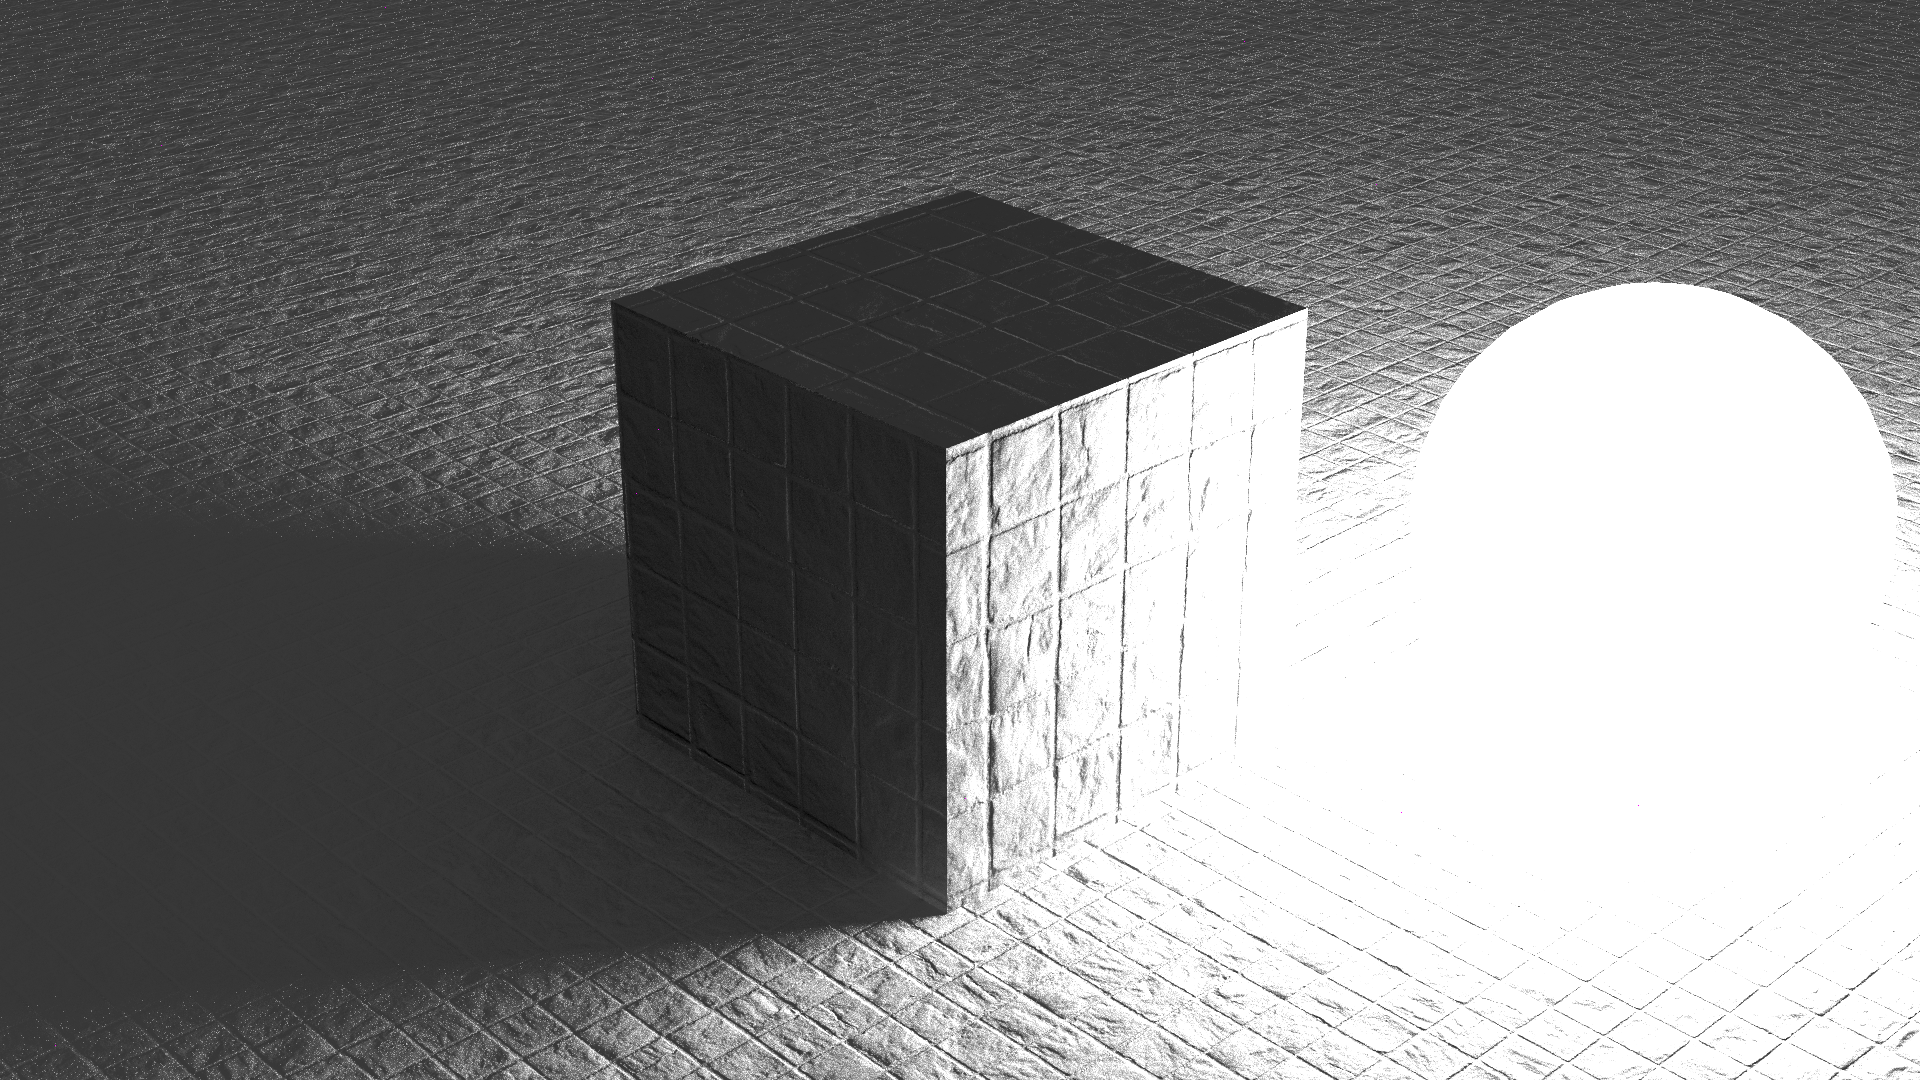
We then implemented final gathering to improve the quality of photon mapping.
It turns out that final gather will turn the bias into noise.
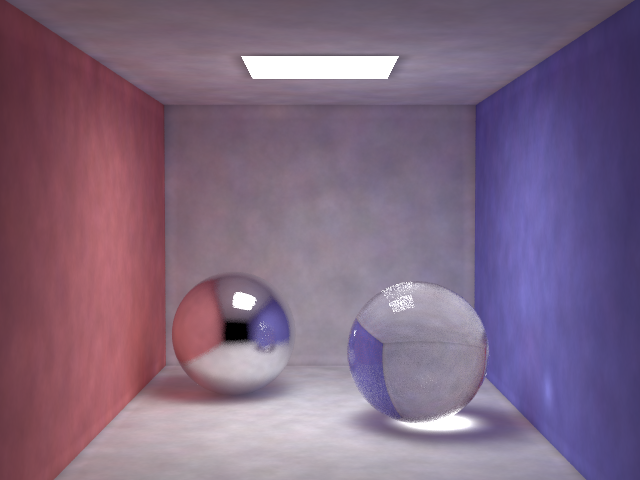
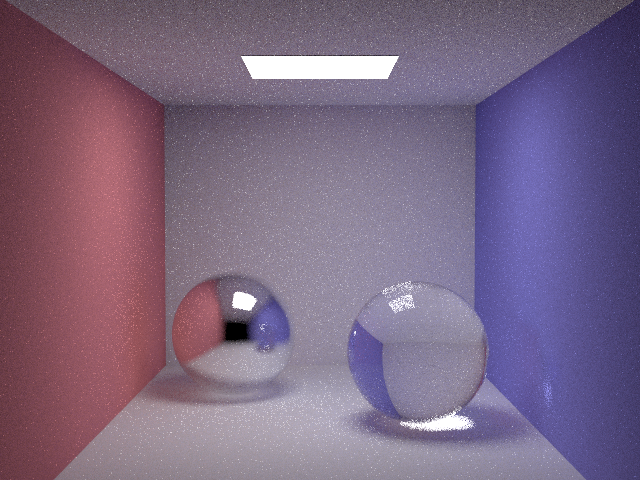
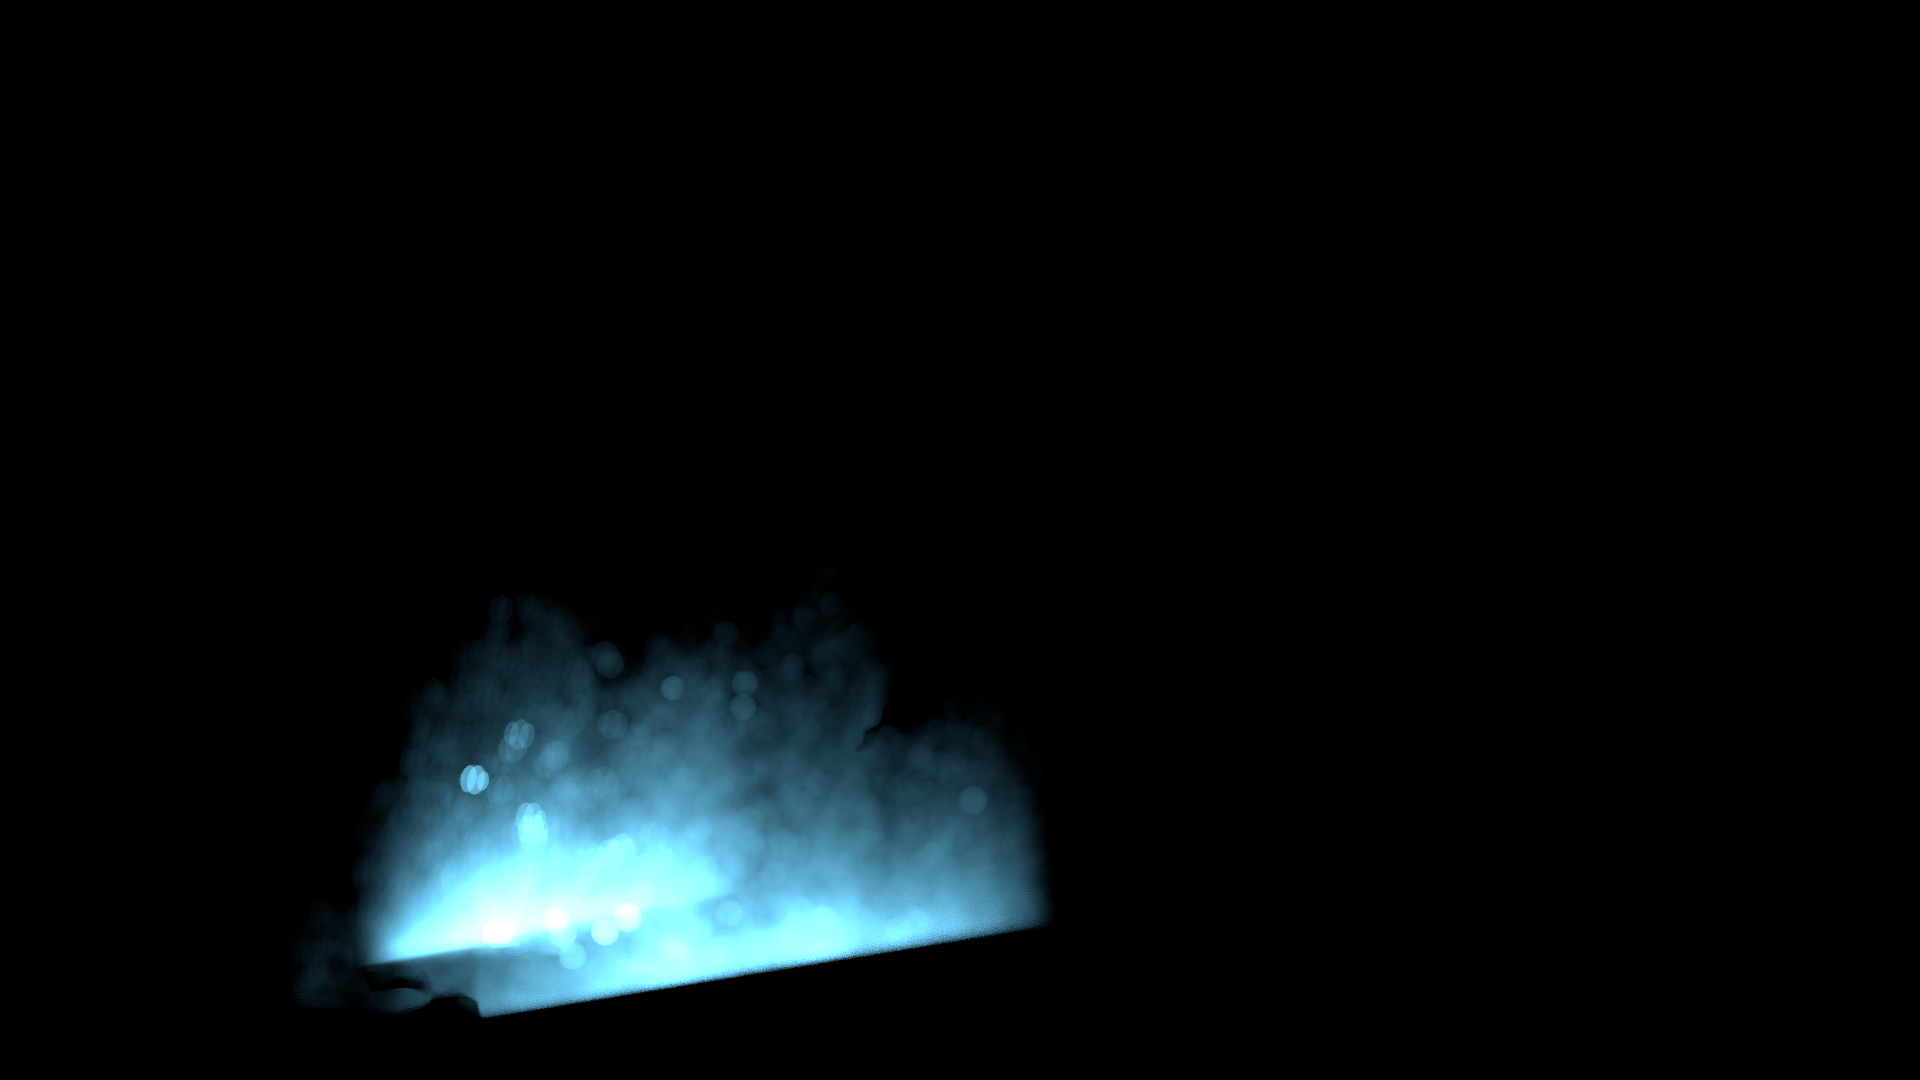
For validation, we place a dielectric sphere with ior = 1 in the scene. The shere should be transparent.
We only output the dirct light and the caustic to see if they are approximately cancel out.
The shadow region have some slight blurring artifacts since we are doing a radiance density estimation.
But the shadow is roughly disappear, proving that our implementation is correct.
For progressive photon mapping, we use the formula to change the search radius.
```
for (int i : range(frame)){
md2 = (i+alpha) / (i+1.f) * md2;
}
```
### Volumetric Photon Mapping
We do it by using ray marching.
This is because some direction of the aurora is extremely thin.
Althought this method is baised, we still think it be quite useful for handling this particular scene.
we also seperately trace surface and volume photon, especially during the genearating period,
it can control the number of photons of different kinds of photons.
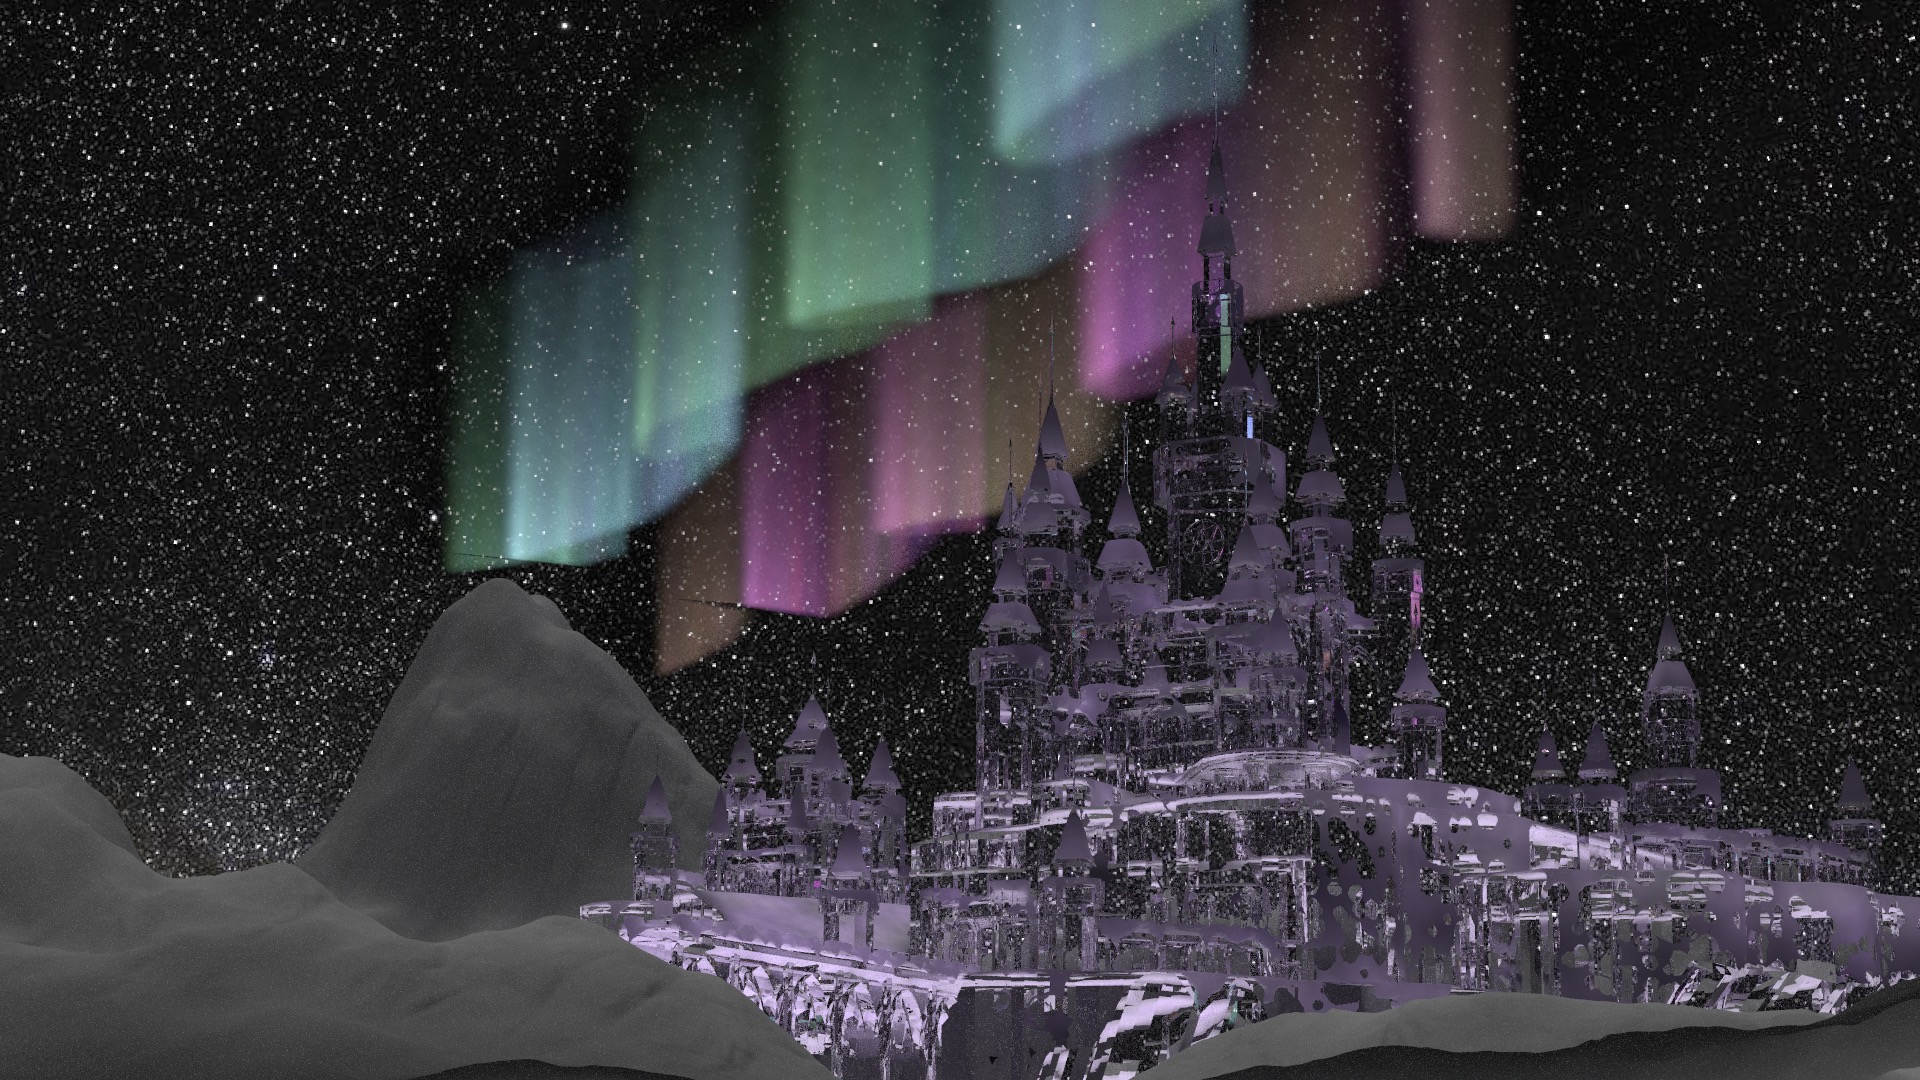
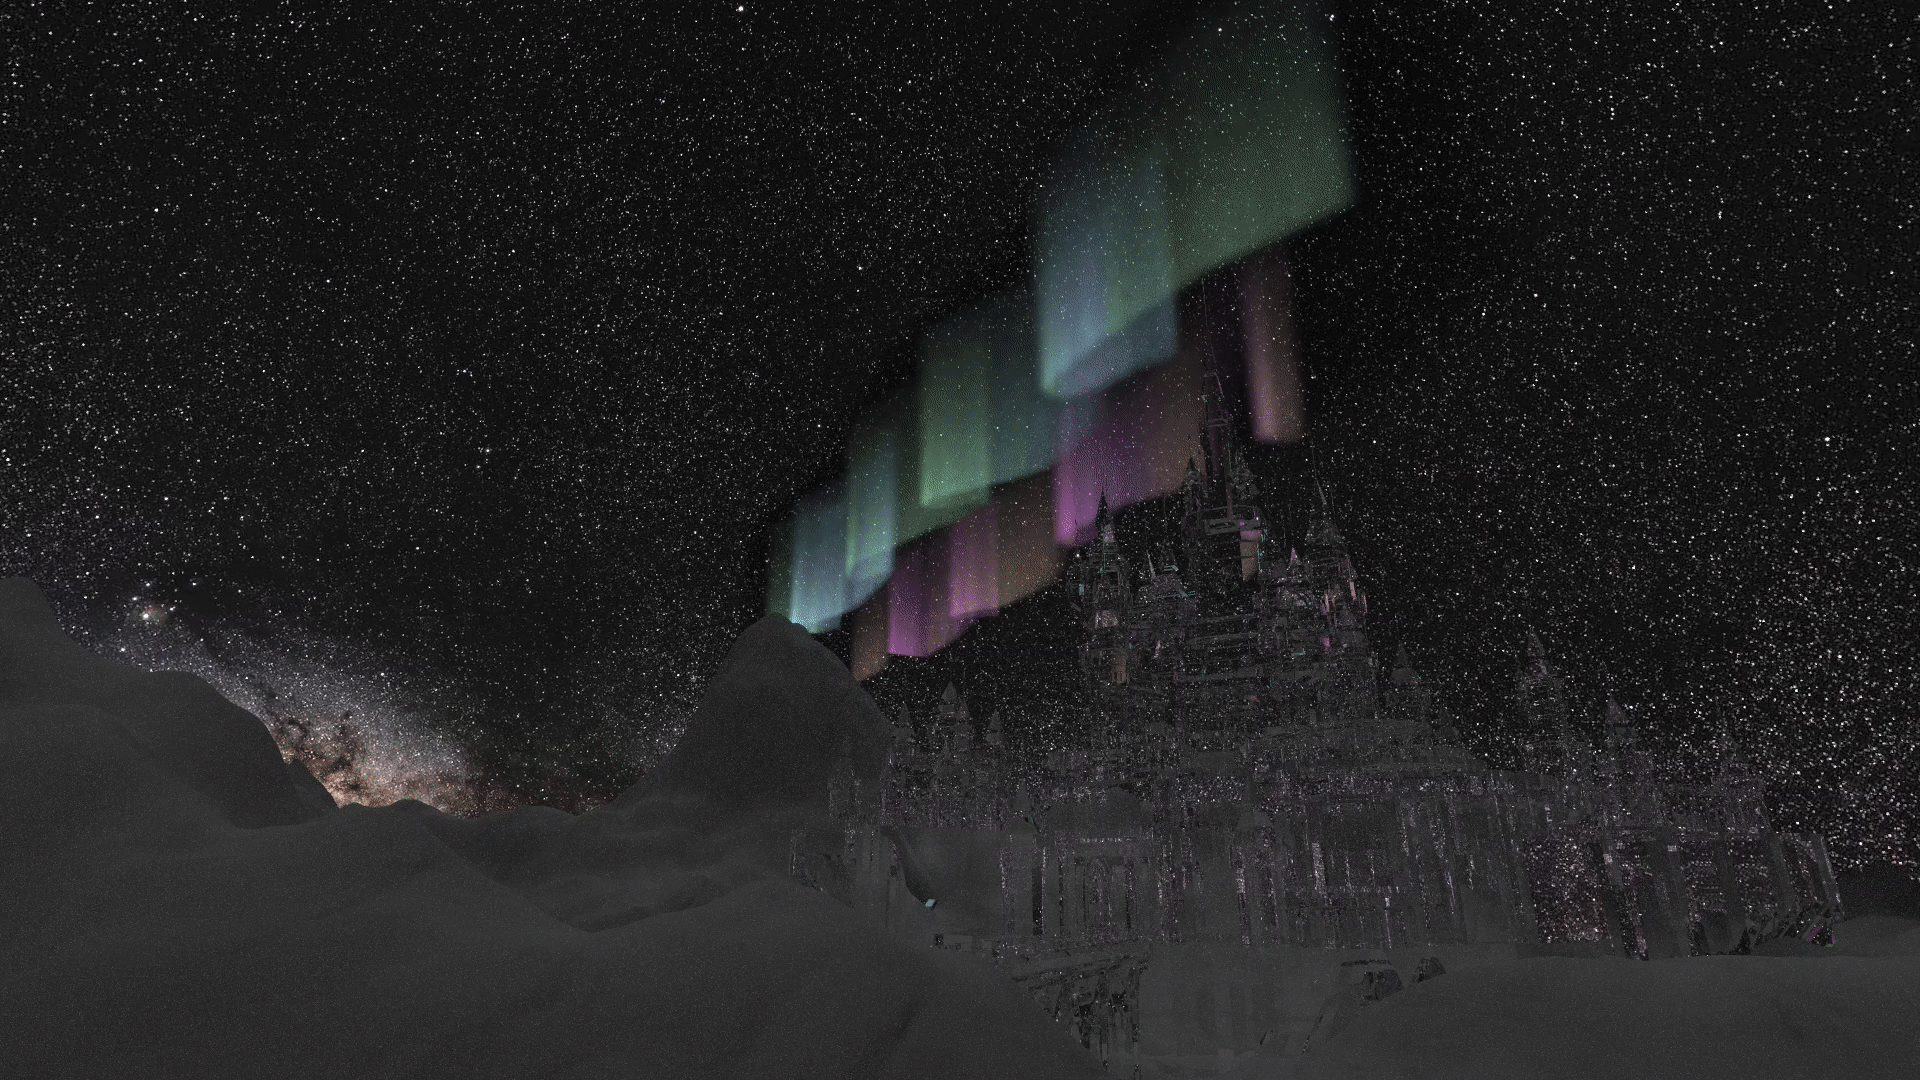
## Scene Design
We decided to render a series of consecutive scenes.
The camera starts from the ice castle, sees the aurora and starry sky, then the dragon, and then the panorama of the snow mountain;
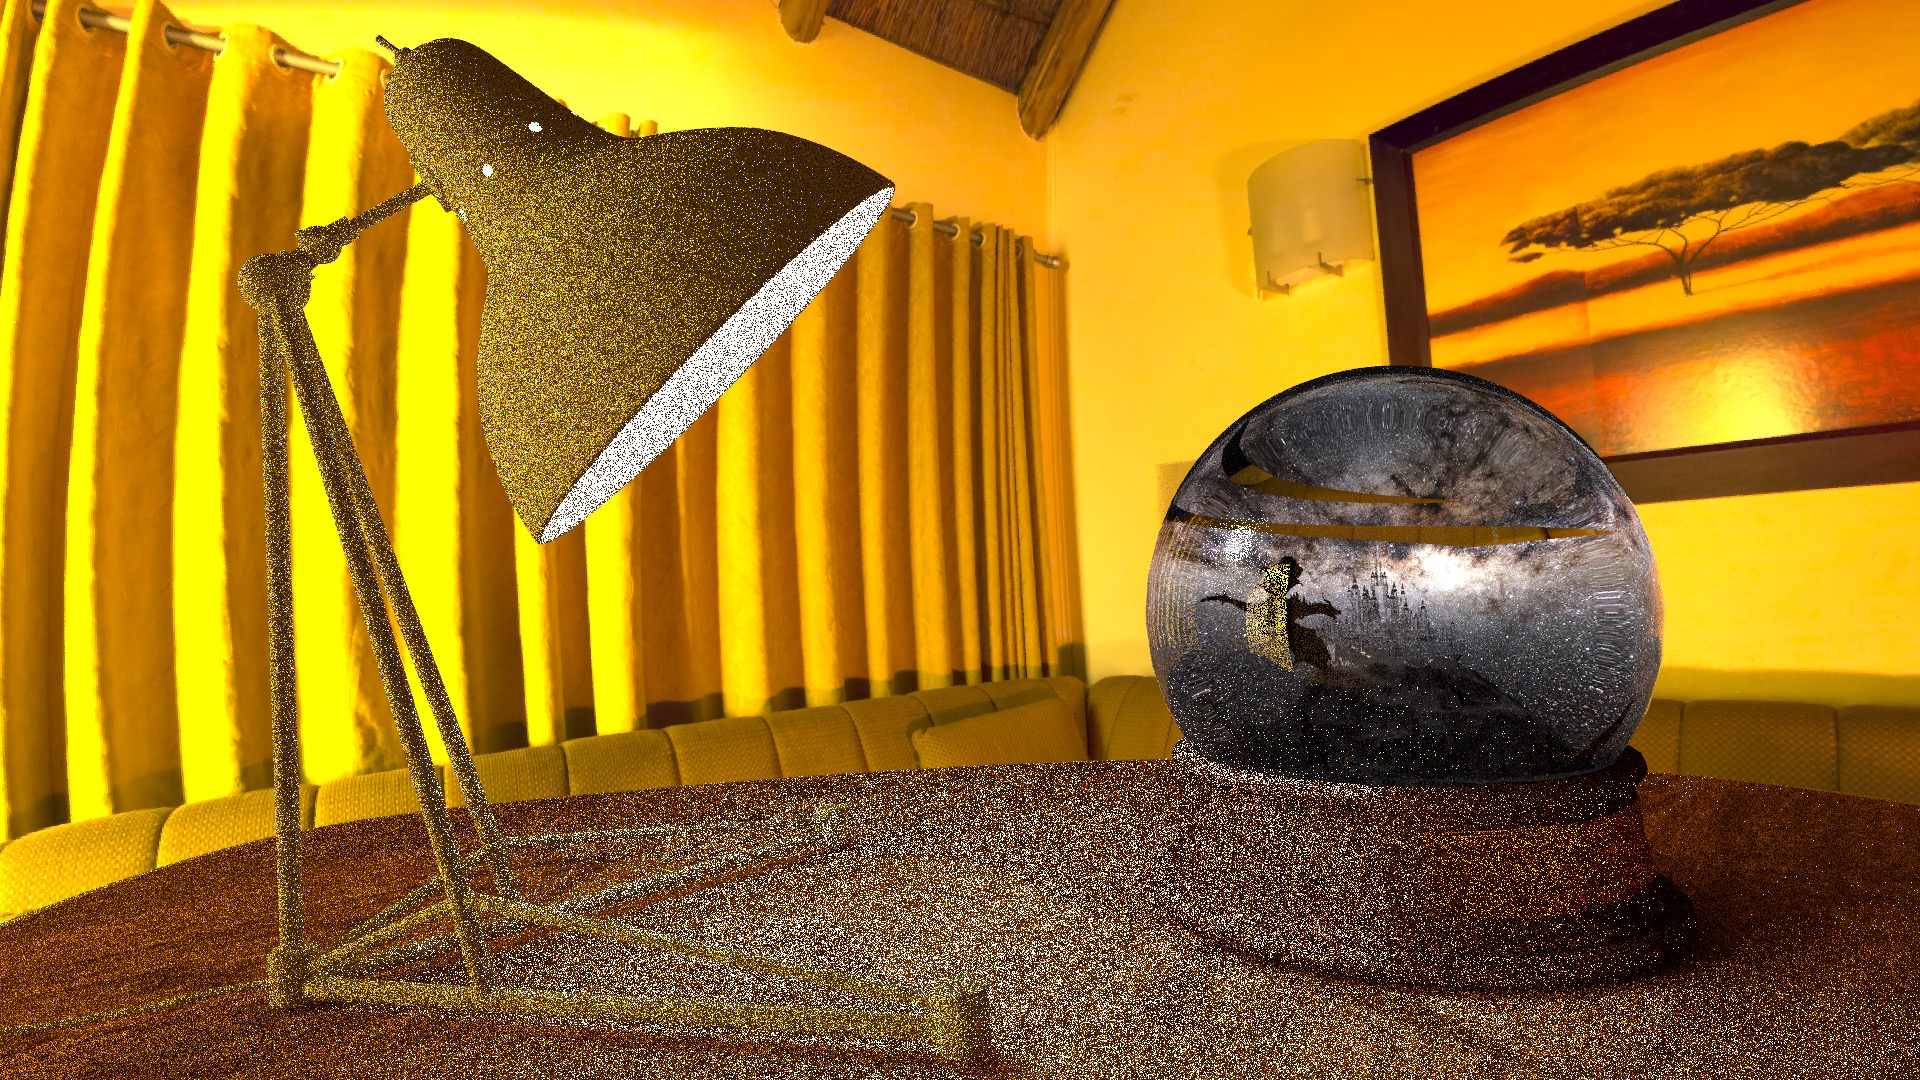
Then we will see that all this is a scene in a snowglobe.
The camera now captures the outside of the snowglobe, which is an indoor tabletop scene.
The camera will move from one scene to another, and each scene has different light sources and objects.
Rendering two completely different scenes (outdoors and indoors) is already a big challenge.
At the same time, we also need to consider how to transition naturally between these two scenes.
In addition to pursuing correct and real physical effects,
we fully consider how to achieve better artistic effects simply and efficiently.
### The Dragon
We use normal maps to add details to the dragon.
We wanted to simulate the dragon's fire using a hetogeneous participating media.
It's tough to master Houdini and convert an emitted heterogeneous participating media to nanoVDB in such a short time.
Although we finally gave up this idea due to the time limitation, we still want to show the result of our efforts.
Here a projected light is used to light up the heterogeneous media created in Houdini.
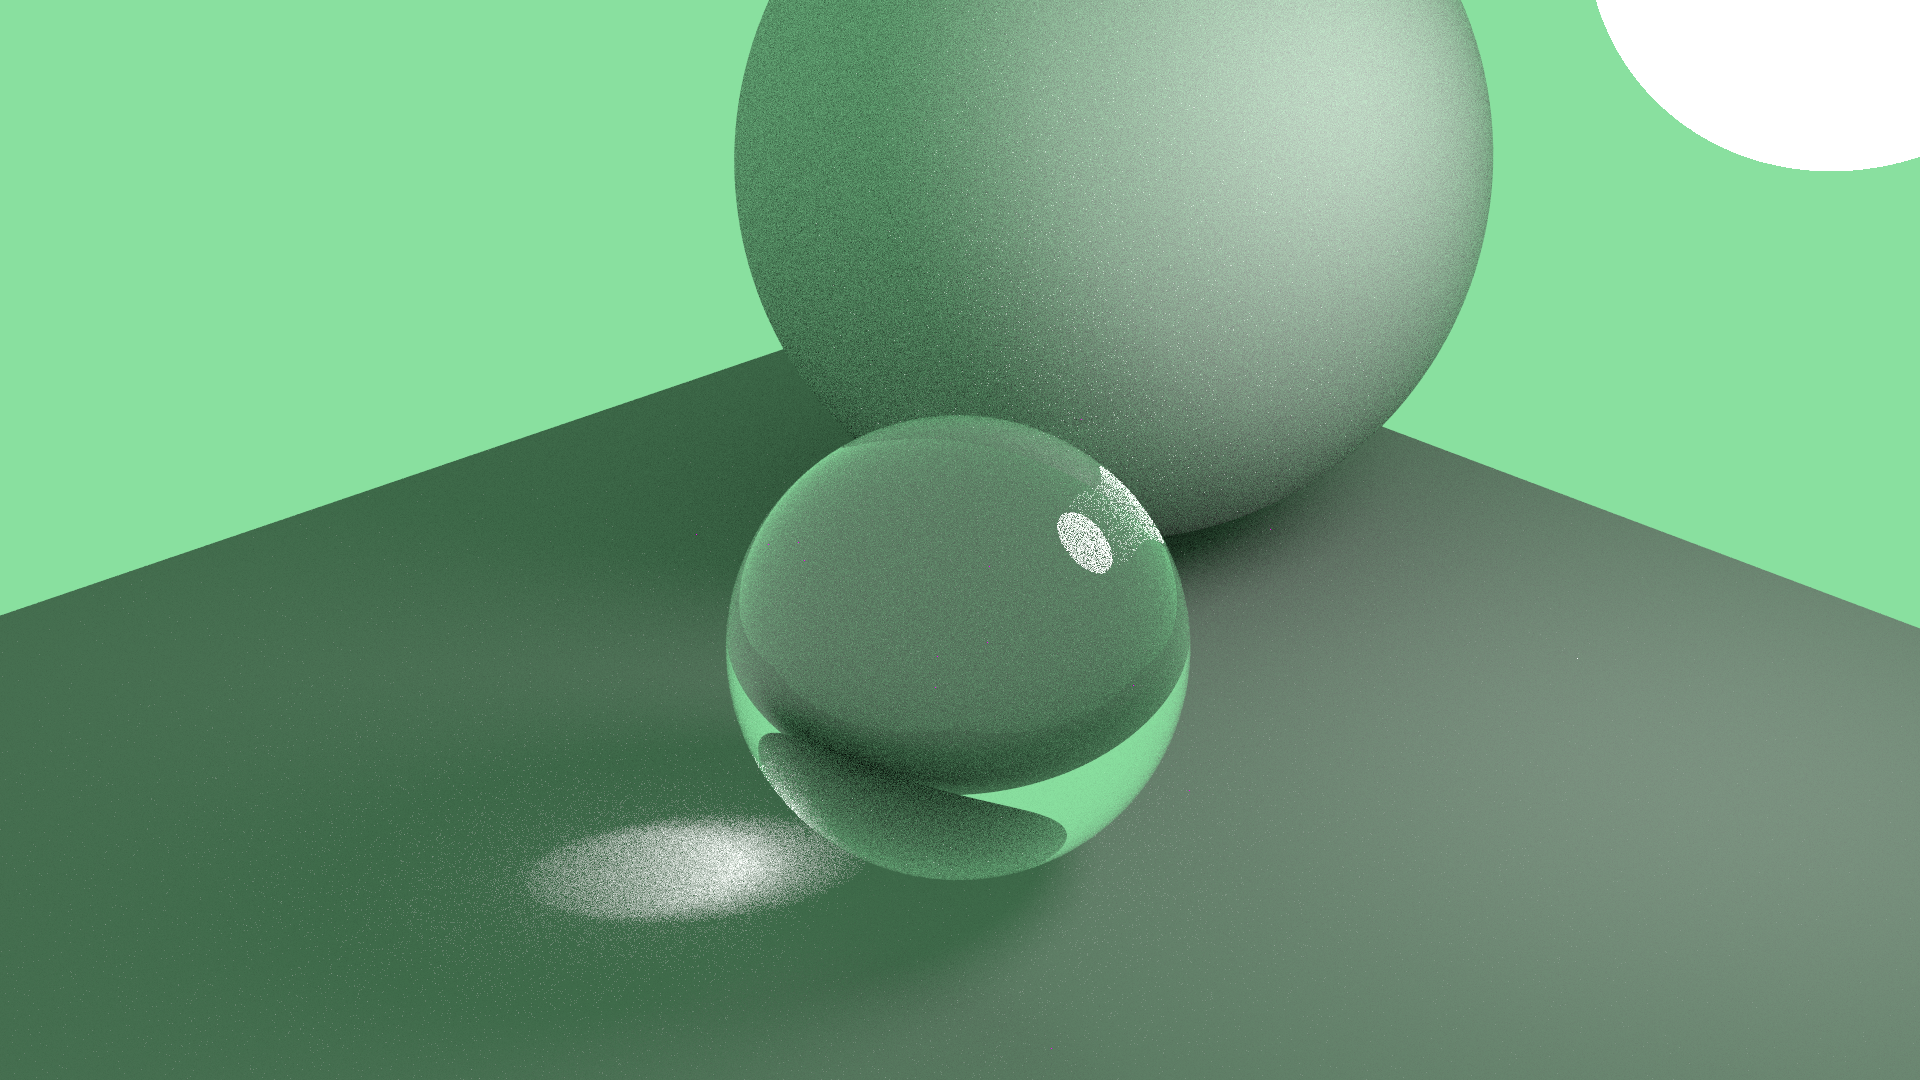
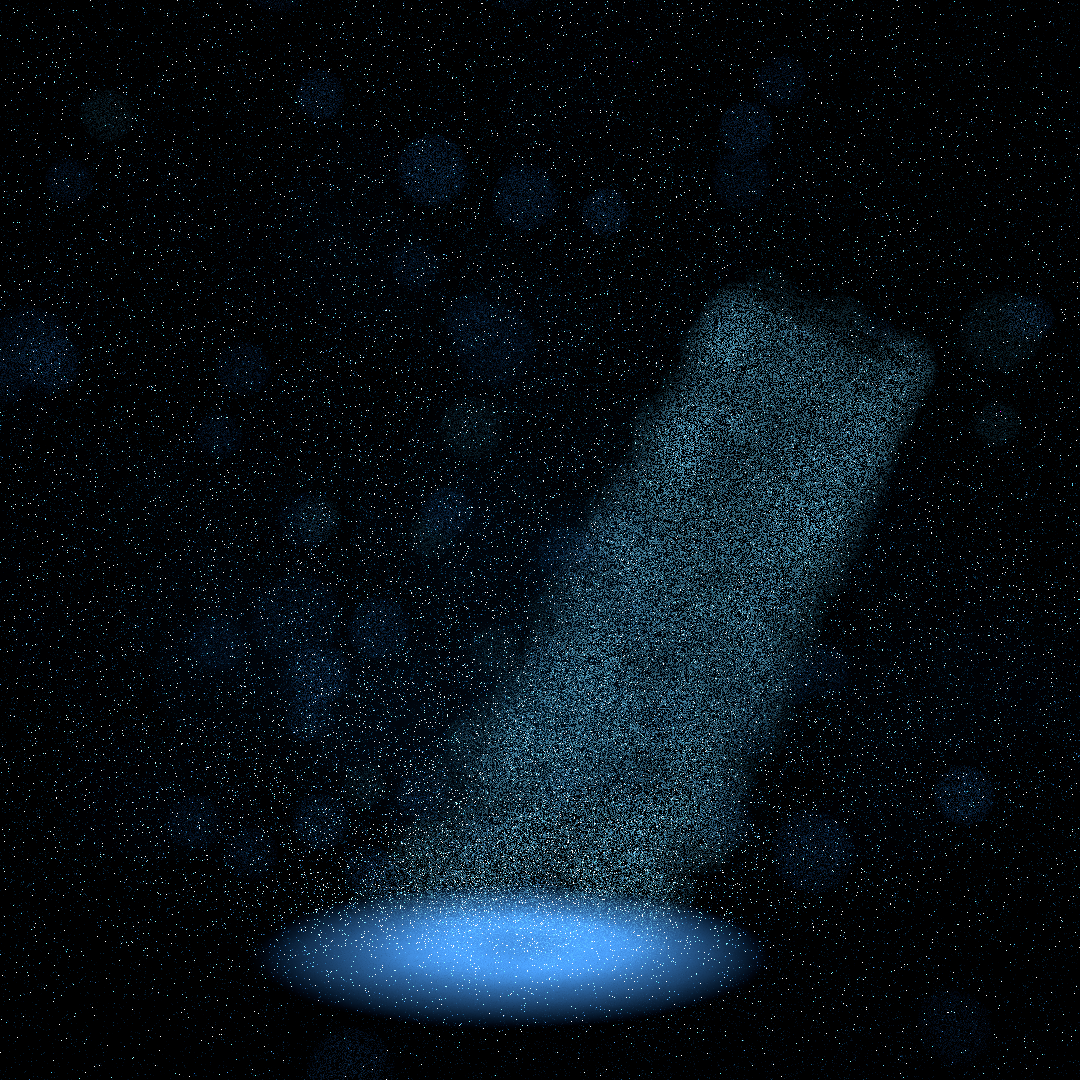
### The Aurora
The geometry of aurora can be simplfied as a series of light beams.
For each "footprint" of the aurora, we have a light beam shoot straight up from the foot print to the sky.
Although it is a good way to use procedurals to generate the footprints,
we decided to draw it ourselves to have more flexibility of control the shape and color of the aurora.


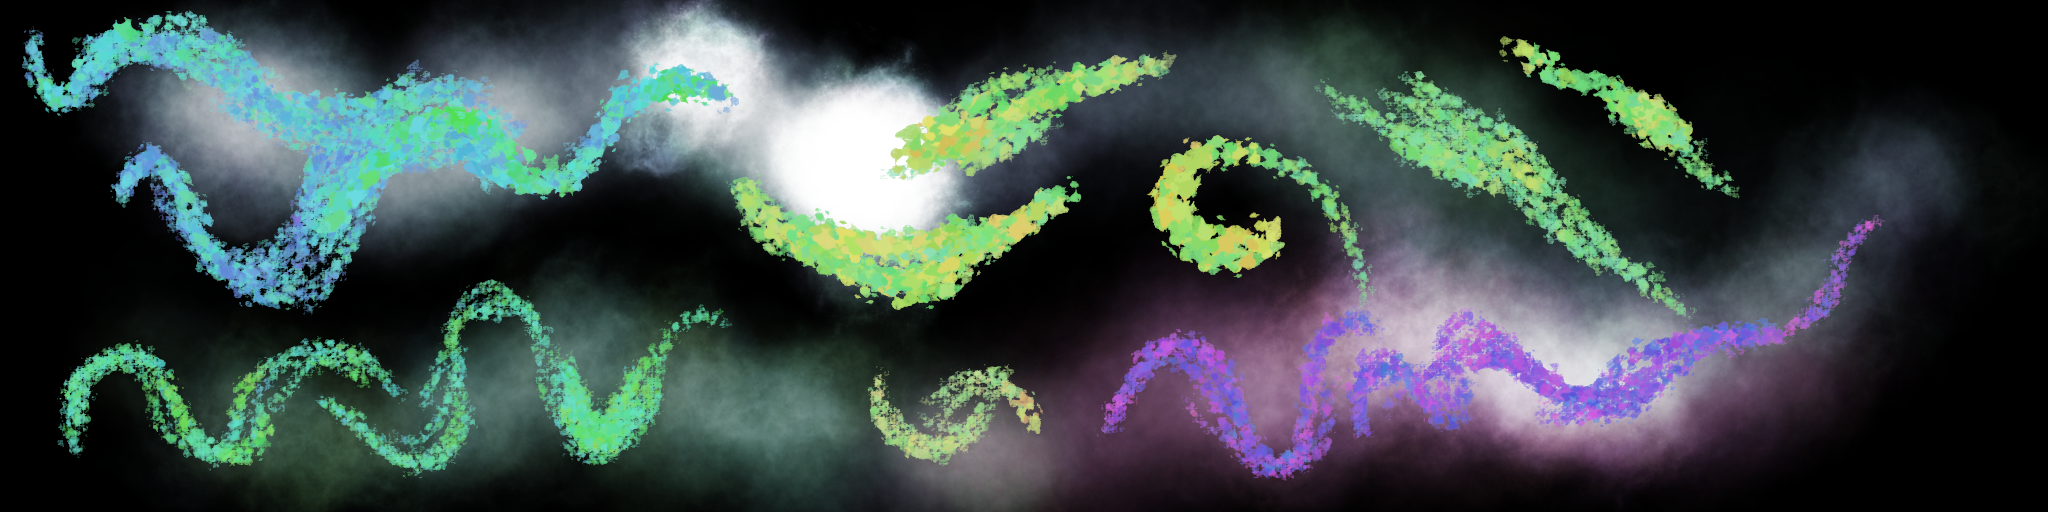
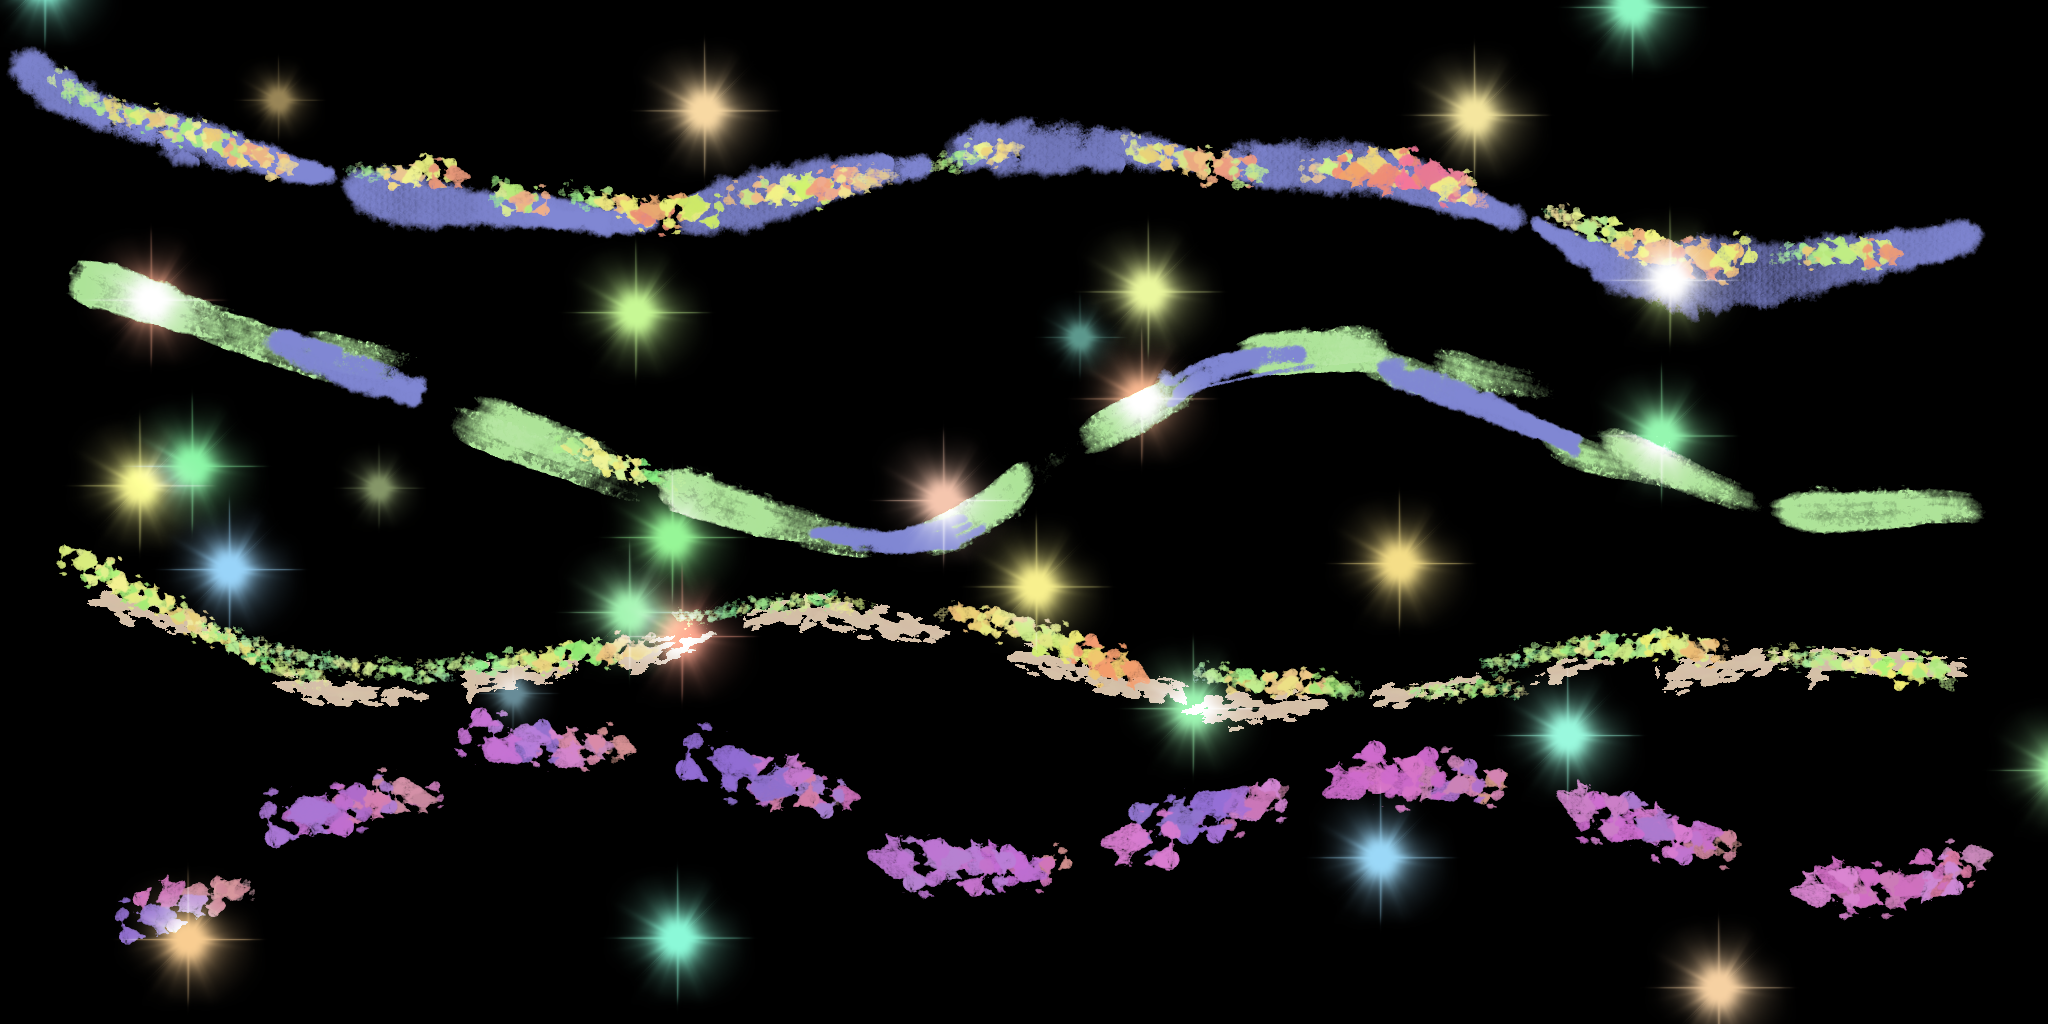
Aurora artist trick:
* Put the projection light under a certain range of volume.
* This volume can only free-sample once, to hold the light line straight up.
* It prevented the scattered light from outside, avoiding most illumination from the other sources of light.
* When doing the surface gathering, the ray directly go throught the volume, to keep transmittance where there is no aurora.(i.e. Integrate the light into the environment)
* The air wall material to control the volume.
* User can spycified whether the light could be seen, could be seen in one side or both side.
### The Ice Castle
We want snow covering the castle, which cound't be done by simply add normal textures.
We use Houdini to simulate snow with depth on the castle.
Houdini can provide magnificent effects, but learning Houdini is a very time consuming process.
It is unfortunate for us not having enough time to create a new material simulating the ice.
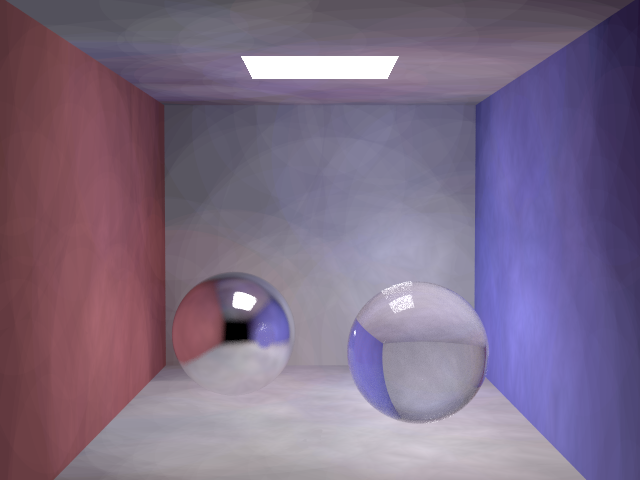
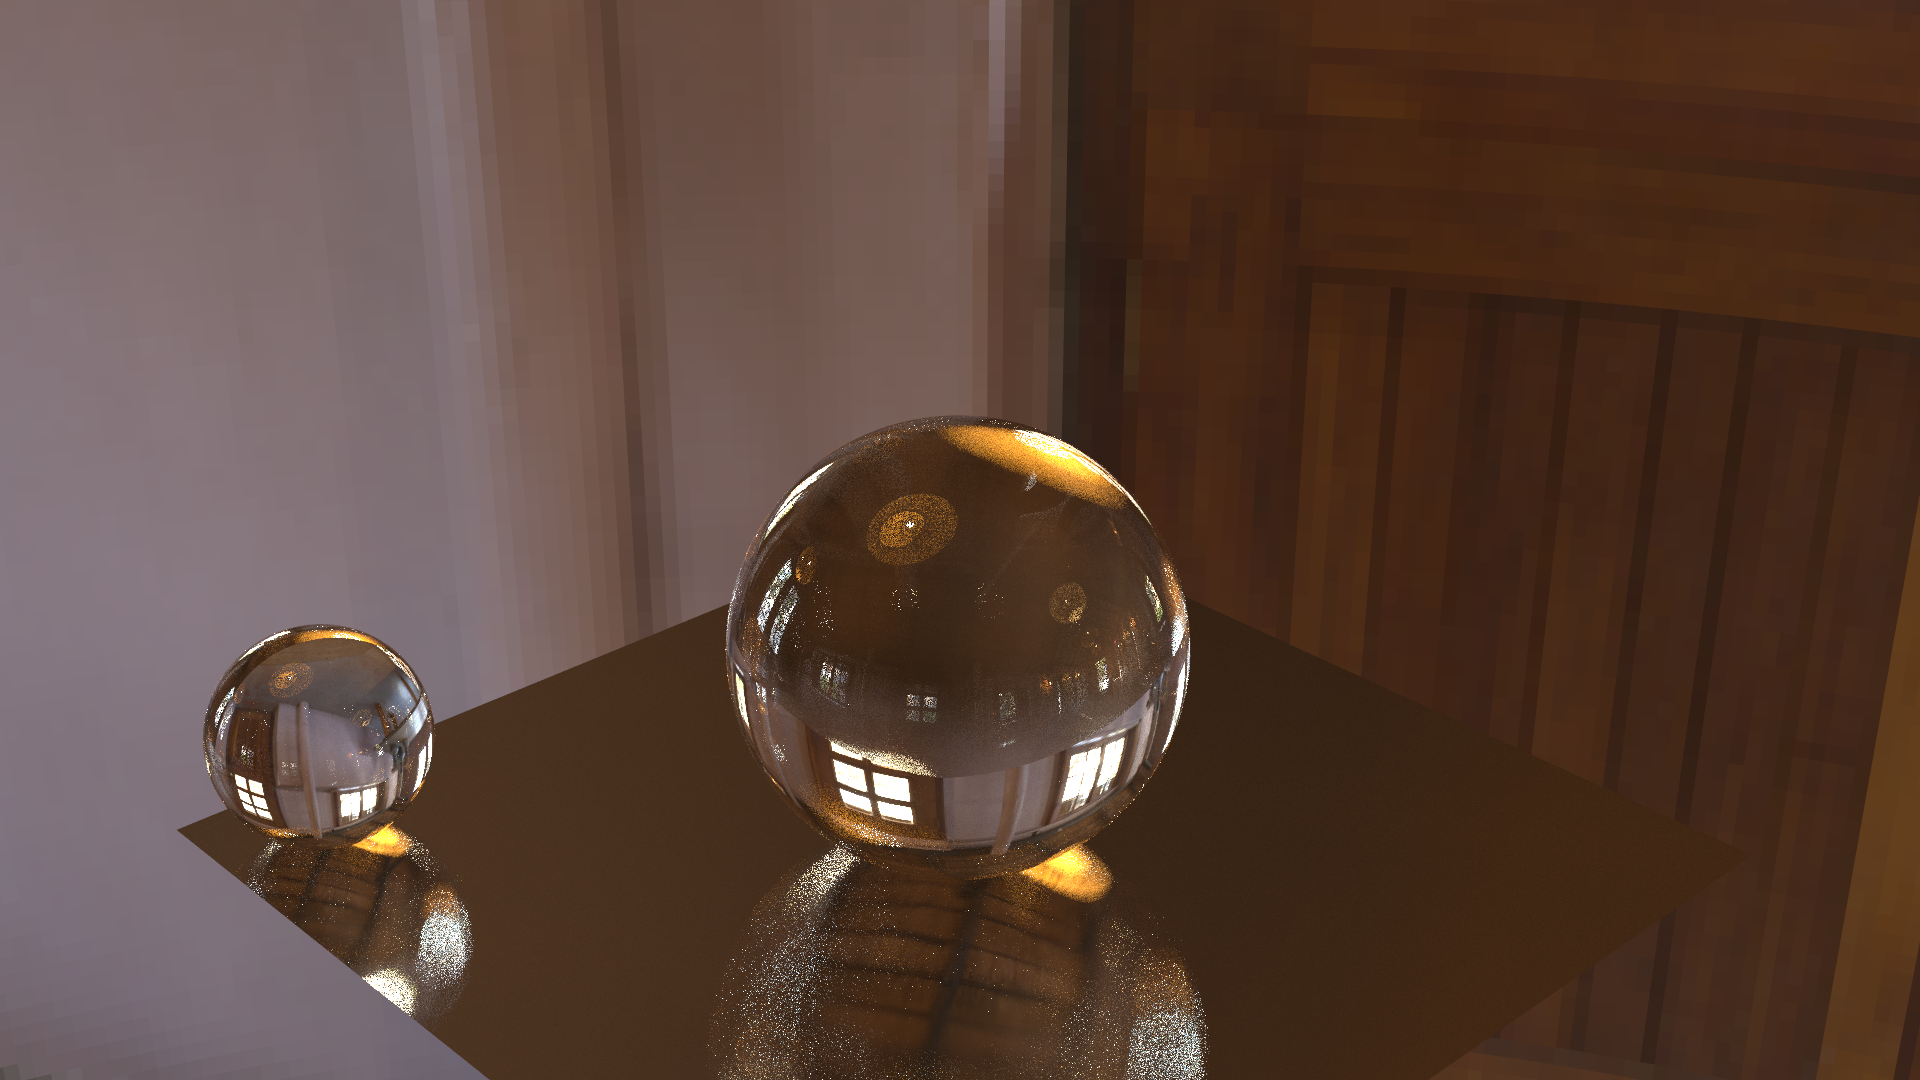
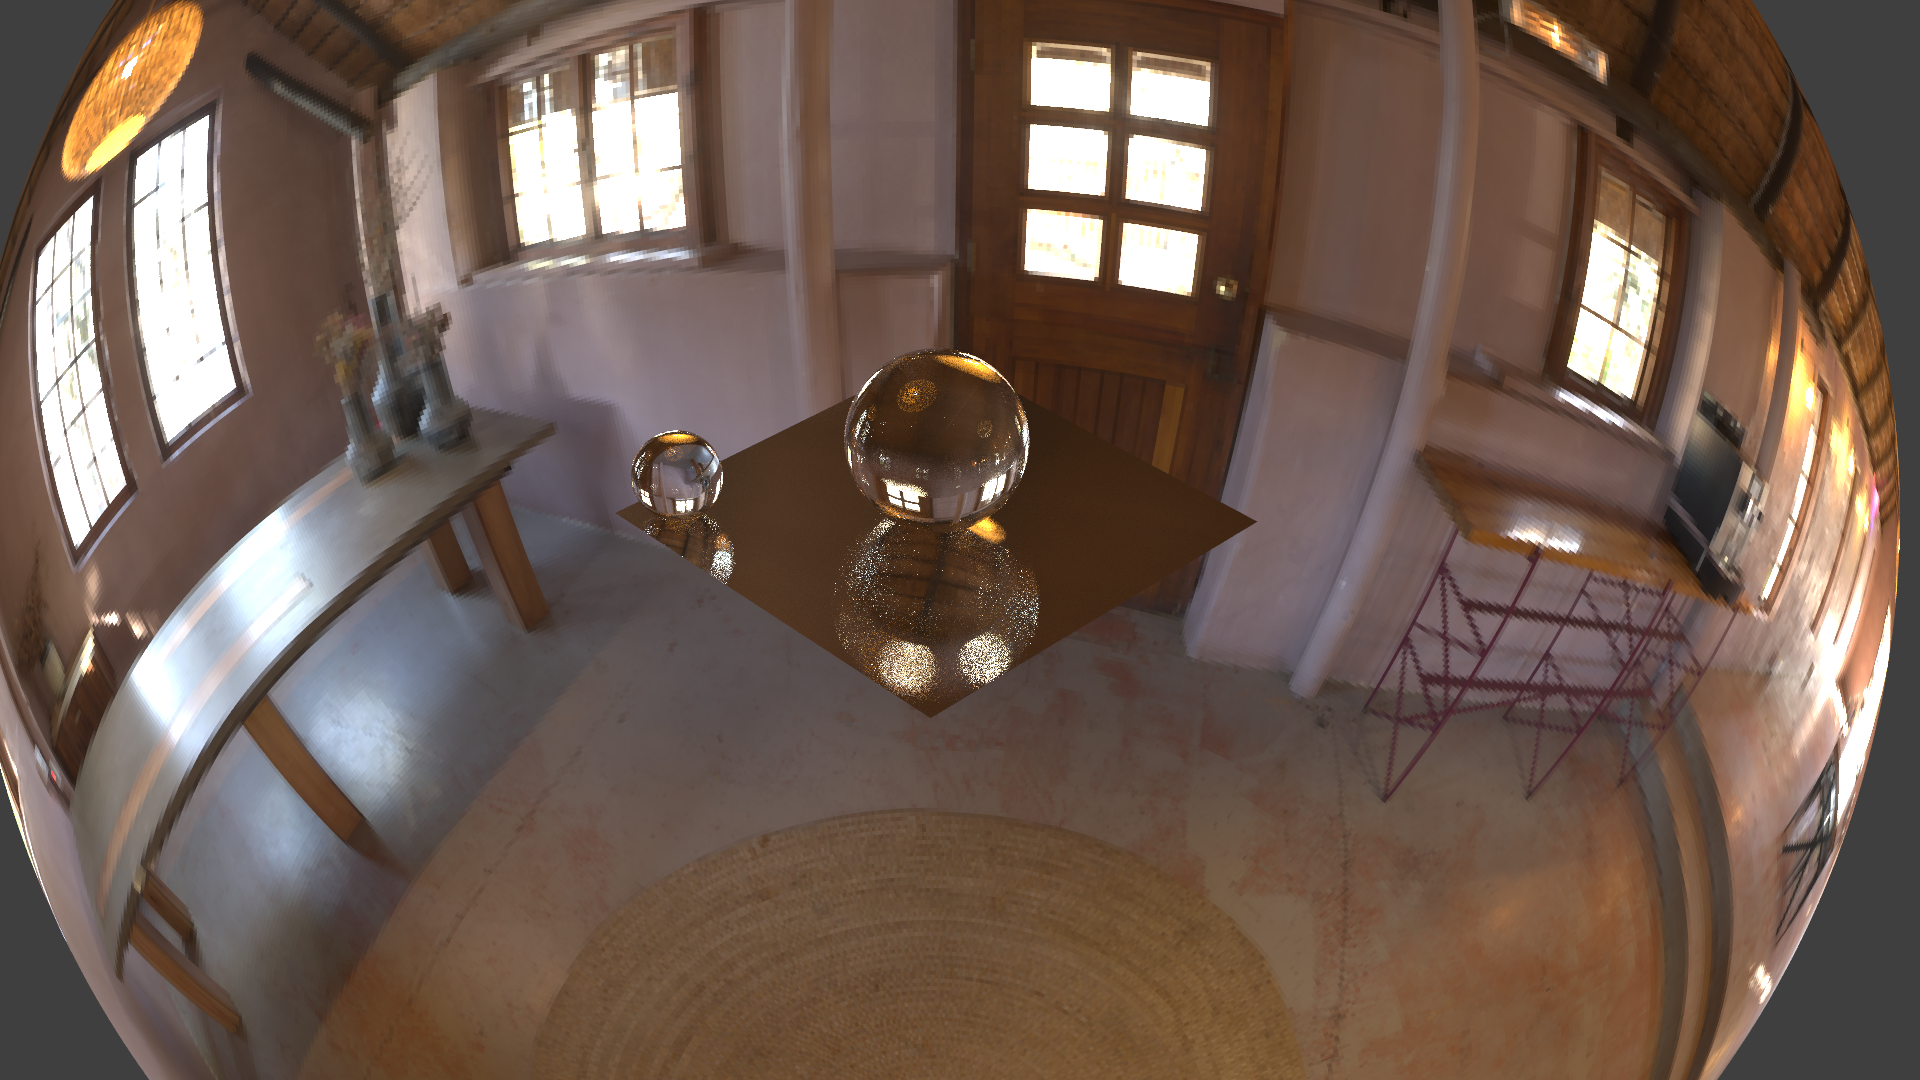
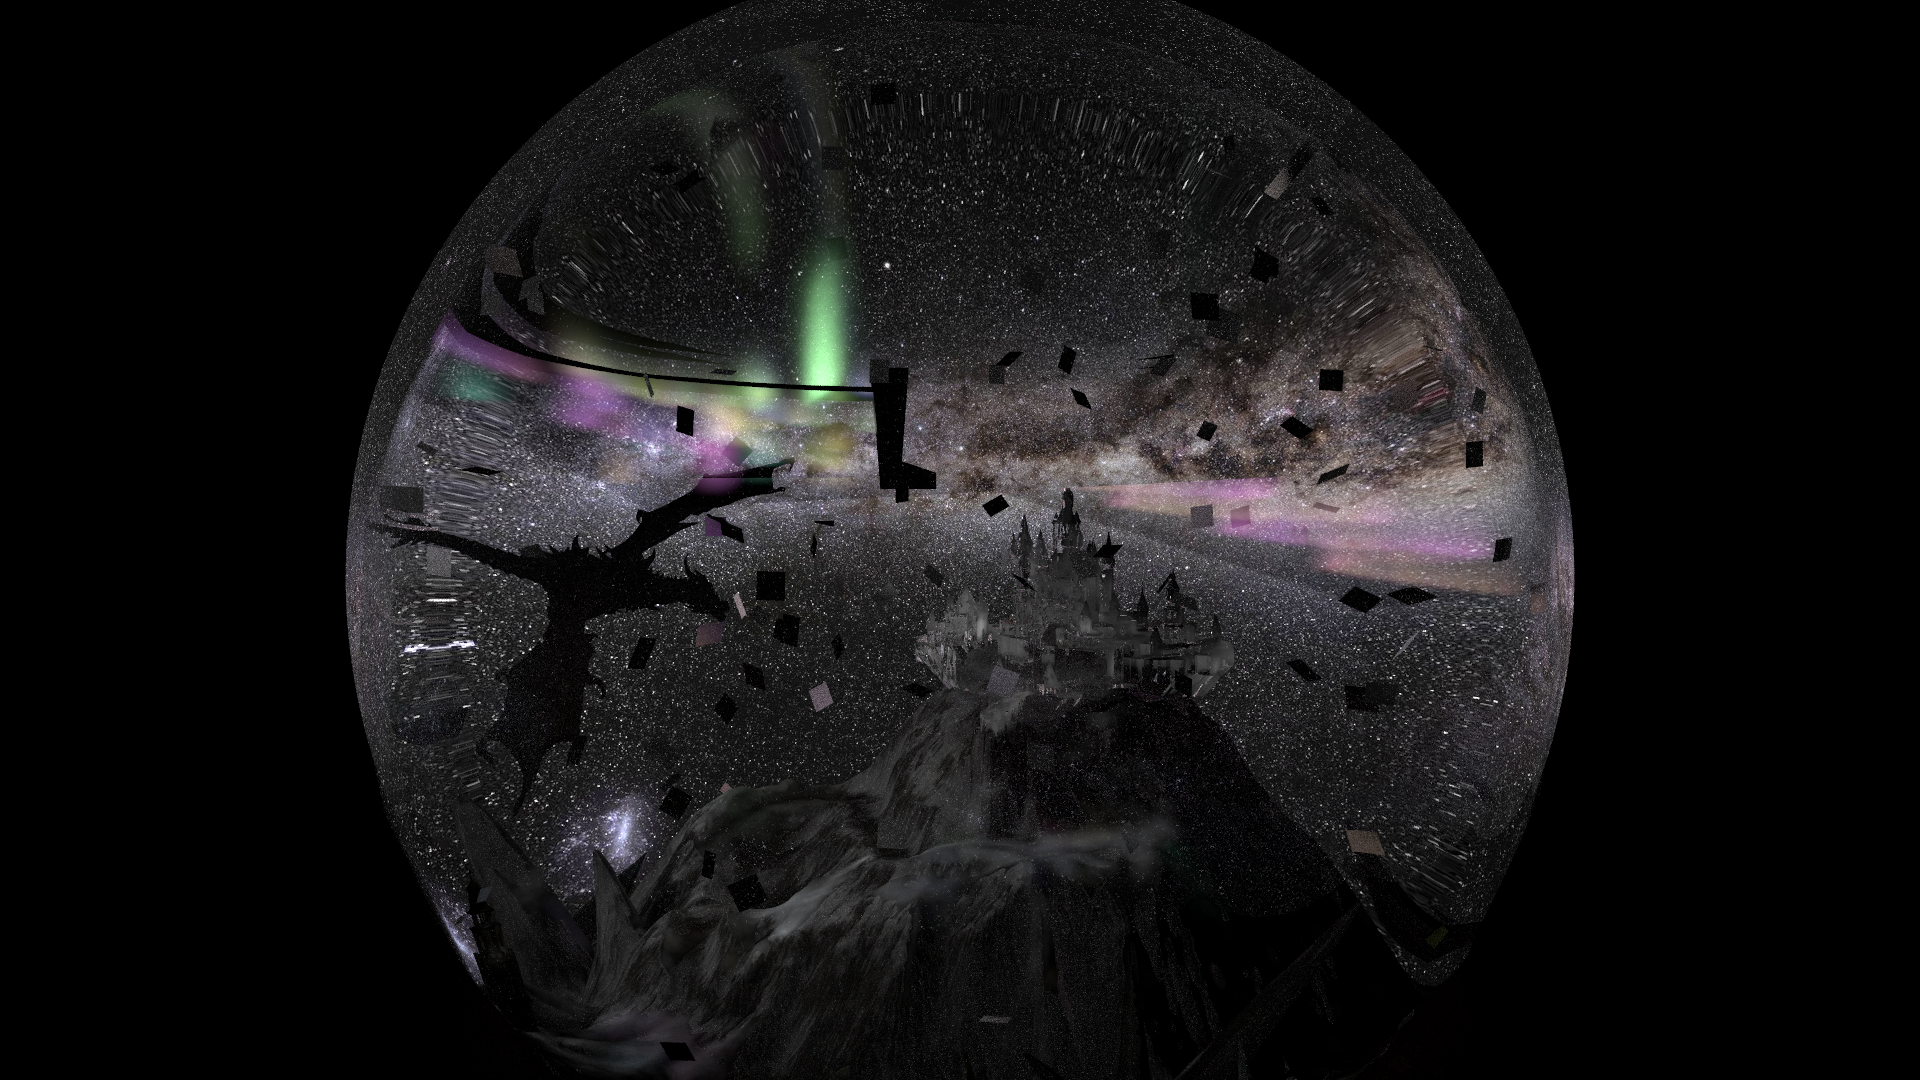
### The Snowglobe
As a night scene with limited light sources, environment map is an important light source of our scene.
There are two separate environments in our scene, one is inside the snowglobe and the other is outside.
As a result, we use two different environment maps.
If the environment light appears as an infinite light source,
the environment map will fill the background with the same size no matter how far the camera is zoomed out.

To build a small environment light inside the snowglobe, we obviously can't use an infinity light.
To solve this, we created a new surface call `BackgroundSurface` (separating from the origin environment class `InfinityBackgroundSurface`),
which is a spherical ambient light with a constrained radius.
However, this spherical shape will completely isolate the environment inside the snowglobe,
making it impossible to see the scene inside from the outside.
We don't want this, so we made some manipulations to its intersect judgment,
so that the outside camera can see through that small background surface and watch inside.
The effect of this surface is shown below:

### Scene Series
Although it is difficult to animate in such a short time,
we can animate the picture in a simple way.
After we model the whole scene, we only change the camera parameters in the JSON file every frame and then re-render.
Here we add a new executable file into Darts to export the animations.
Since we had to render hundreds of frames in a short time,
we parallelized the rendering process.
In this process, some rendering quality may be sacrificed in exchange for an increase in rendering speed.
For example, reduce the number of samples, reduce the number of photon searches and increase the search step size, etc.
We use nanothread for parallel rendering.
For normally integrators, we use each thread to generate one image,
similarly as do on the instances
(i.e. save computertation resources for other classmates).
For photon mapping, we ues parallel do the prograssive path tracing.
So all threads are rendering the same pictures with different radius.
# Division of Labor
We have done all the work together.
# Final Results
# References
Our models are from the following sources:
* [sketchfab](https://sketchfab.com/)
* [designconnected](https://www.designconnected.com/)
* [designconnected](https://www.designconnected.com/)
* [free3d](https://free3d.com/)
* [cgtrader](https://www.cgtrader.com/)
* [polyhaven](https://polyhaven.com/)
* [clara](https://clara.io/)