This page tells you how to download and install Java 7 and Eclipse on Windows 8, and how to configure Eclipse.
If you already have Eclipse installed on your PC, you need to get rid of it. To do so, first quit Eclipse if you're currently running it. Then, go to your workspace folder (probably in Documents/workspace) and save anything there that you want to keep, because you're about to get rid of this folder. Next, drag the workspace folder to the Recycle Bin.
Find your eclipse folder and drag the eclipse folder to the Recycle Bin.
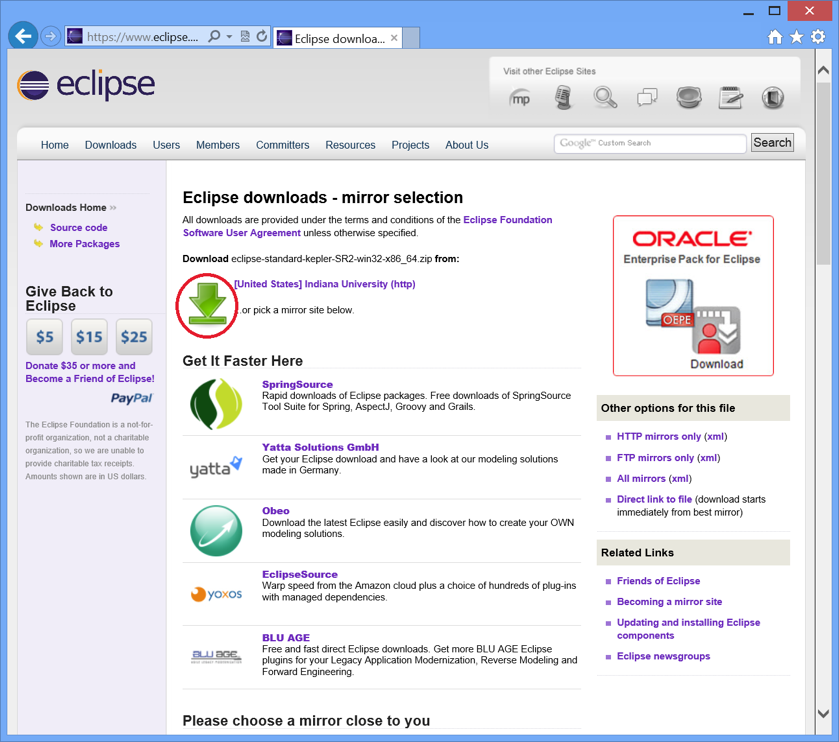
Now you're ready to download and install the newest version of Eclipse. Go to this website. You'll see a window like this:
I've circled the link you should click on. It's the "Windows 64 Bit" link next to "Eclipse Standard 4.3.2."
You'll see this window:
Click on the green download arrow that I've circled. Click on "Open." The download might take a few minutes. You should not feel compelled to donate.
After the download completes, folders should automatically expand. When that's done, you should see a folder named eclipse in a window. Drag the eclipse folder to your Desktop.
Open the eclipse folder in your Desktop. You'll see an item named Eclipse.
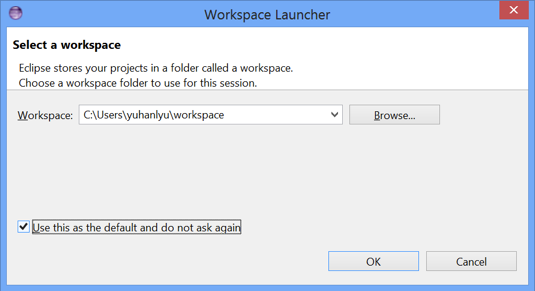
Launch Eclipse. You'll see a window like this:
It will have your user name rather than mine (yuhanlyu). Select where you want your workspace to be; I recommend the default of your Documents folder. Click the checkbox for using this location as the default, and then click OK.
You'll see a window like this:
Click on the Workbench arrow in the upper right that I've circled. You shouldn't see this screen again, even if you quit Eclipse and relaunch it.
You'll get an empty workbench like this:
You have now installed Eclipse!
In the Eclipse menu bar, click on the Window menu item and then on Preferences. You'll see a window with two panes. On the left pane is a list of types of things you can configure.
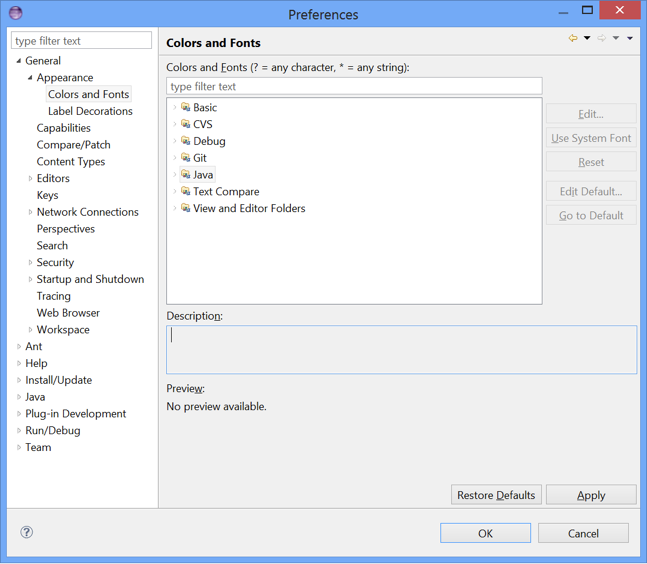
Click on the triangle to the left of General. Then click on the triangle to the left of Appearance. Then click on "Colors and Fonts." You should see a window like this:
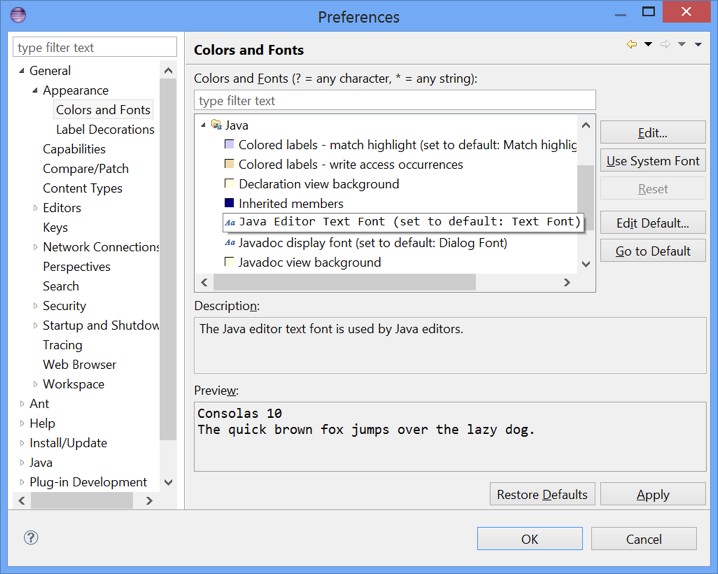
In the window in the middle, click on the triangle next to Java. Then double-click on "Java Editor Text Font":
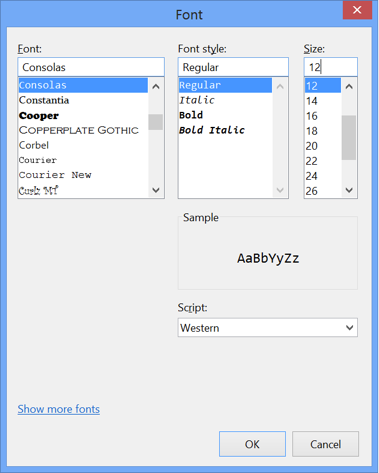
You'll see this window:
On the right, where you can select the size, click 12. Then close this window by clicking on the window's close button.
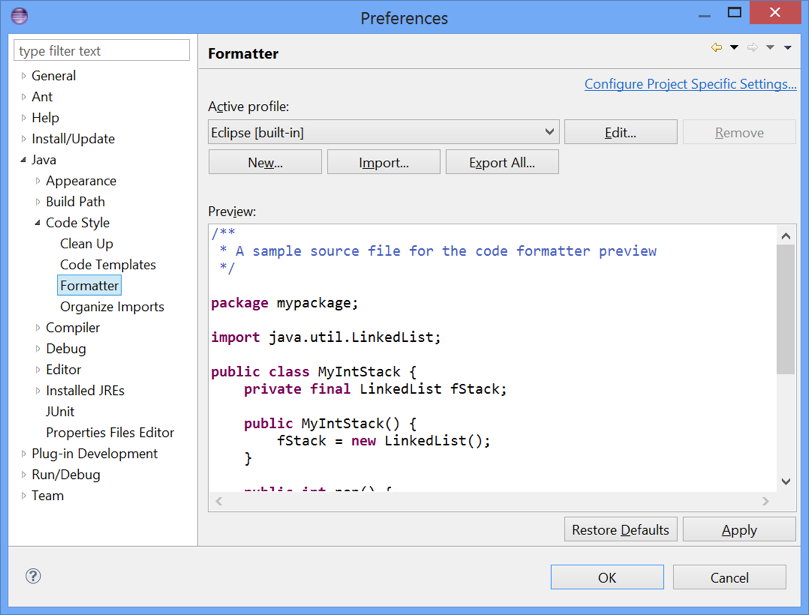
Close up the General preferences by clicking on the triangle to the left of General. Click the triangle next to Java and then click the triangle next to "Code Style." Then click Formatter. Here's what you should see:
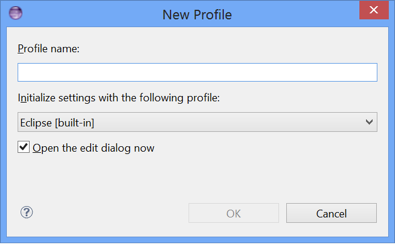
Click the button that says "New...". You'll see a window such as this one:
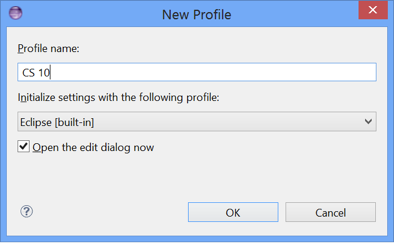
You can type in any profile name you like. I used "CS 10":
Click OK.
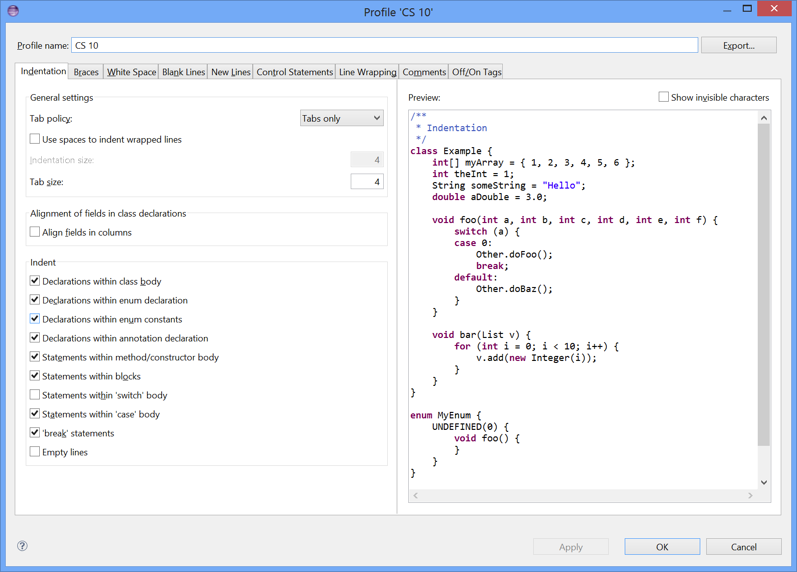
You should see a window like this:
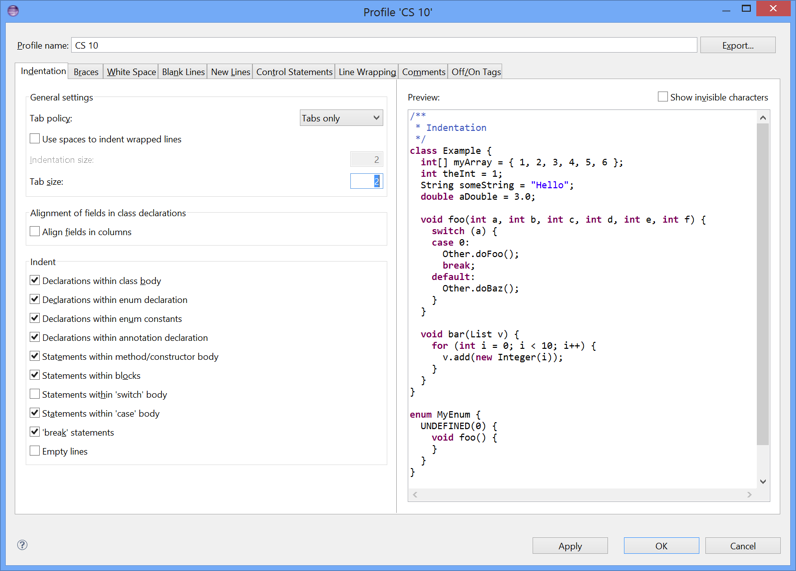
Change the tab size to 2:
You'll see that the indentation size automatically changes as well.
Click on "Blank Lines," and after "Between import groups" and "Before declarations of the same kind," change the values 1 to 0:
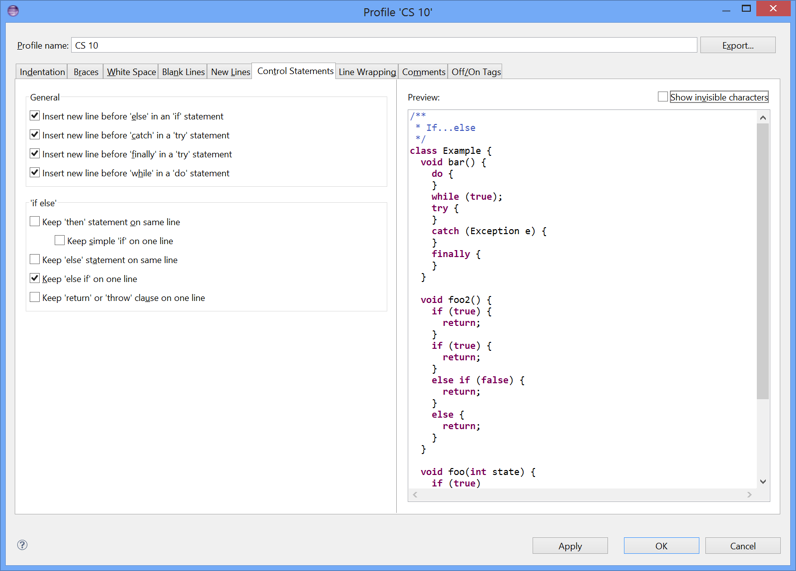
Click on "Control Statements," and check the first four boxes as I've done here:
Click OK.
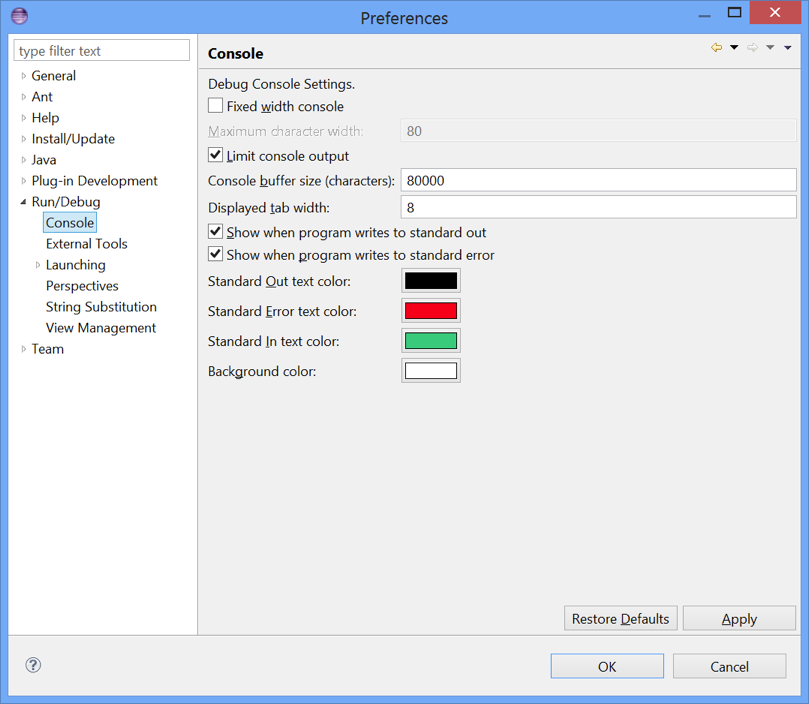
Now click on triangles to close up Java. Click on the triangle next to Run/Debug, and then click on Console:
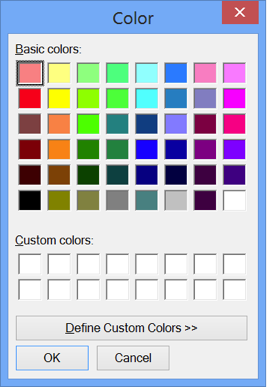
Click on the green color sample next to "Standard In text color." You'll get a color picker:
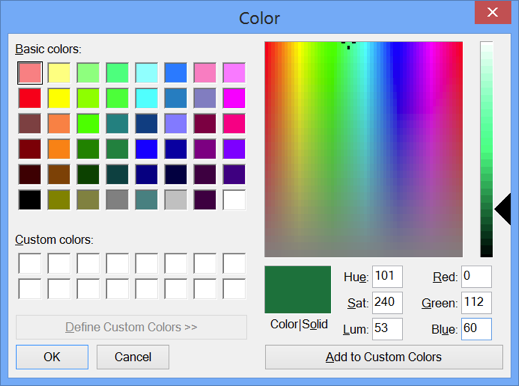
Click on "Define Custom Colors." On the right, there are three boxes labelled by Red, Green, and Blue. Type 0 for Red, 112 for Geen, and 60 for Blue. That will give you dark green. (You're at Dartmouth. What other color could you possibly want?)
Close the color picker window by clicking its close button, and click OK again to close the Preferences window.
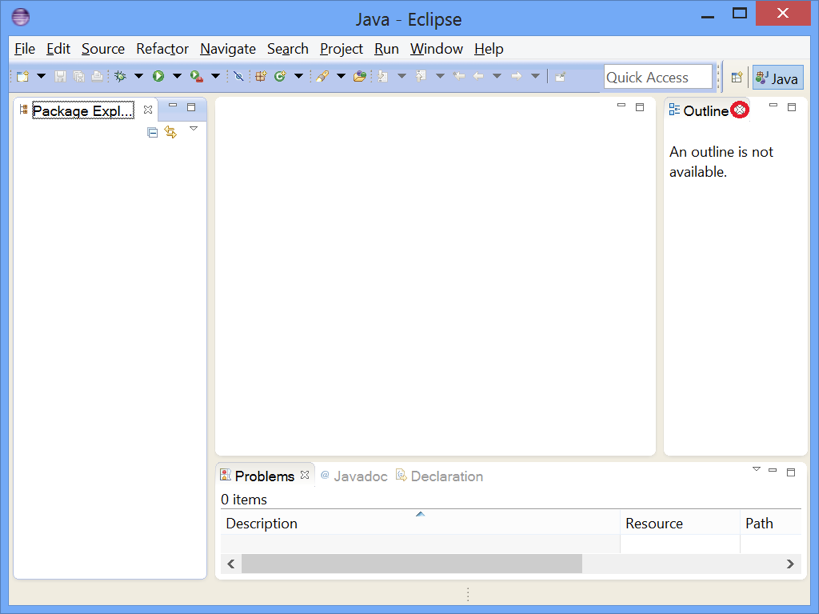
Finally, I don't use the Outline pane, which is on the right-hand side of the window. Click on the "X" next to Outline in the tab of this pane; I've circled the "X":
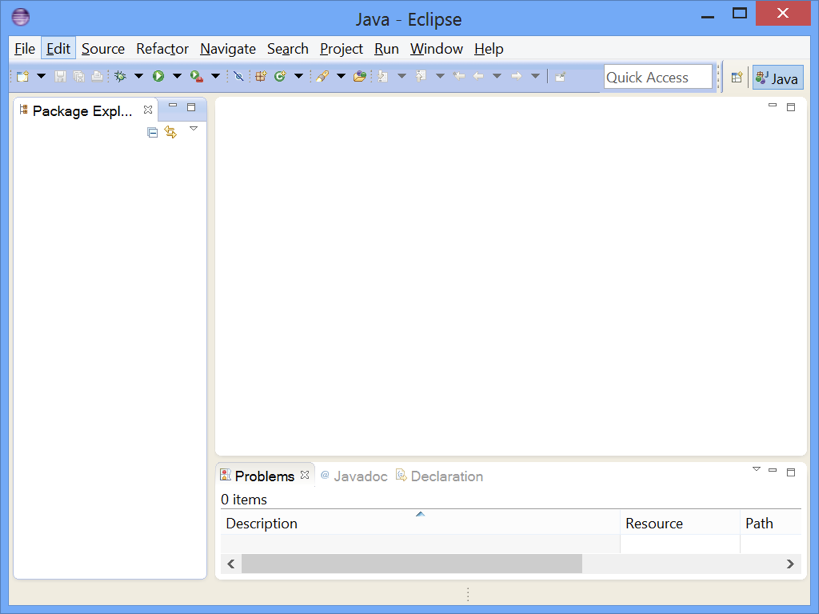
You'll get something like this:
And you're done!