Git flow
Recall the unit about merge conflicts.
Wouldn’t it be nice if there were a way of interacting with Git to minimize such conflicts? to interact with Git such that pulled code is always working but intermediate progress is still tracked?
One popular solution is Git Flow (git-flow), a technique of interacting with Git that makes developing projects within a team work smoothly and effectively.
This approach is now common in many development contexts.
The core concept of git-flow is the following:
intermediate work is done on a side branch; it is only merged into main when perfected.
Originally proposed by Vincent Driessen in a post on nvie.com, git-flow operates on the principle that the main branch should only contain release-ready code.
Because Vincent Driessen’s proposed system is meant for much bigger projects than those in CS50, we use a simplified version of git-flow.
The basic structure of git-flow follows these steps:
- Branch
- Develop
- Test
- Push
- Pull Request (aka “merge request” on some platforms)
- Merge
Branch
You’re about to start working on a feature. Before you get started, though, do one small thing: branch. Because git-flow requires that we do in-progress work on dedicated feature branches, we must create a branch to track progress on that feature, even if it’s not done yet!
# Switch to the main branch so your branch is based on the most recent work
git switch main
# Create the new branch named after the feature
git branch featureName
# Switch to the feature branch
git switch featureName
Develop
Edit the code to add the desired feature. In fact, make only the changes necessary for this feature. Your branch’s commits should include only that feature. It helps to keep each branch focused on one feature… leading to quicker reviews, clearer merges, and an understandable git history.
Are you halfway done with one feature and want to start another one? Not a problem. Commit whatever changes you have locally to your feature branch, then start from step 1 on the next feature (branch from
main, develop, etc.)
As you code away, commit every time you finish something, pause to work on something else, and even taking a break to get lunch:
git commit -m "Made progress:
- Worked on this
- Coded that
- Optimized such and such"

git push origin featureName
Note the push is to origin featureName not to main.
For the example shown below, we envision a trivial task: adding a README to the repo. First, create a branch and switch to it:
$ git branch add-readme
$ git switch add-readme
Switched to branch 'add-readme'
Power tip: you can create and switch to a new branch in one command:
$ git checkout -b add-readme
Switched to a new branch 'add-readme'
Test
Ensure you run all the unit tests and regression tests, and add all the necessary documentation.
Then, merge any recent changes to the main branch, into this feature branch:
$ git fetch origin main
$ git merge main
If you get any conflicts, now is the place and time to fix them.
And, if you’ve pulled in any updated code, run all your regression tests again, to be sure your feature integrates properly with the new code from main.
Finally, if you had to make any changes - to fix conflicts or any integration bugs - commit them to this branch… and repeat this step.
Push
Finally, when it seems your feature is complete, and fully tested with the latest code from main, push it to GitHub:
$ git push origin add-readme
Enumerating objects: 7, done.
Counting objects: 100% (7/7), done.
Delta compression using up to 16 threads
Compressing objects: 100% (5/5), done.
Writing objects: 100% (5/5), 738 bytes | 738.00 KiB/s, done.
Total 5 (delta 0), reused 0 (delta 0), pack-reused 0
remote:
remote: Create a pull request for 'add-readme' on GitHub by visiting:
remote:      git@github.com:cs50-2022-fall/activity-git-flow/pull/new/add-readme
remote:
To git@github.com:cs50-2022-fall/activity-git-flow.git
 * [new branch]      add-readme -> add-readme
Becuase this example shows the first push of this branch add-readme to GitHub, you’ll see a confirmation that GitHub recognizes it as a [new branch] on the last line.
As an aside: there is some value in pushing your feature branch to GitHub occasionally, rather than waiting until it is complete and ready for merging back into
main: (1) GitHub serves as a backup for your laptop, and (2) your teammates can see your progress and, in event of a disaster or reshuffling of tasks, take over from you.
Pull Request
Finally, your code is finished! It is ready to be included in the whole project. Time to open a Pull Request (PR)!
The first time you push your feature branch to GitHub, it offers you a handy link to open a pull request; see the example above.
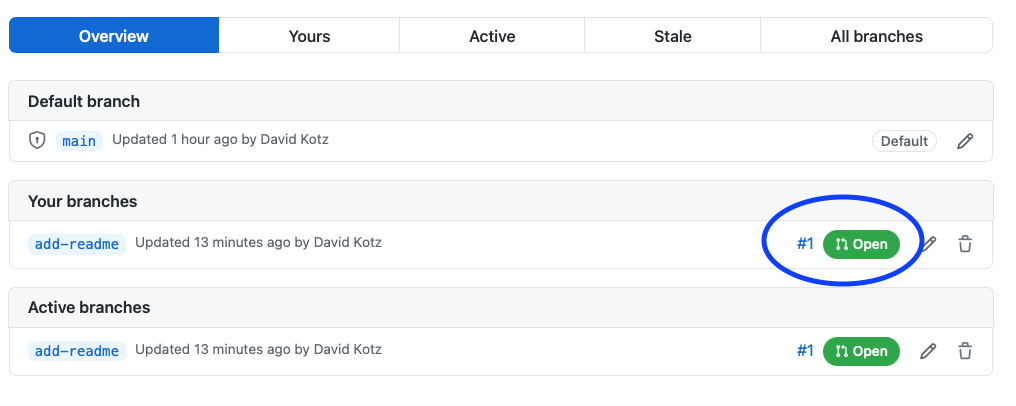
If, however, you’ve been pushing your feature branch to GitHub for a while, you’ll need to find that branch on GitHub; click the branches button on the repo’s home page:

Then click the Open button:
Add a short and long description of this Pull Request, and then press the Create Pull Request button:
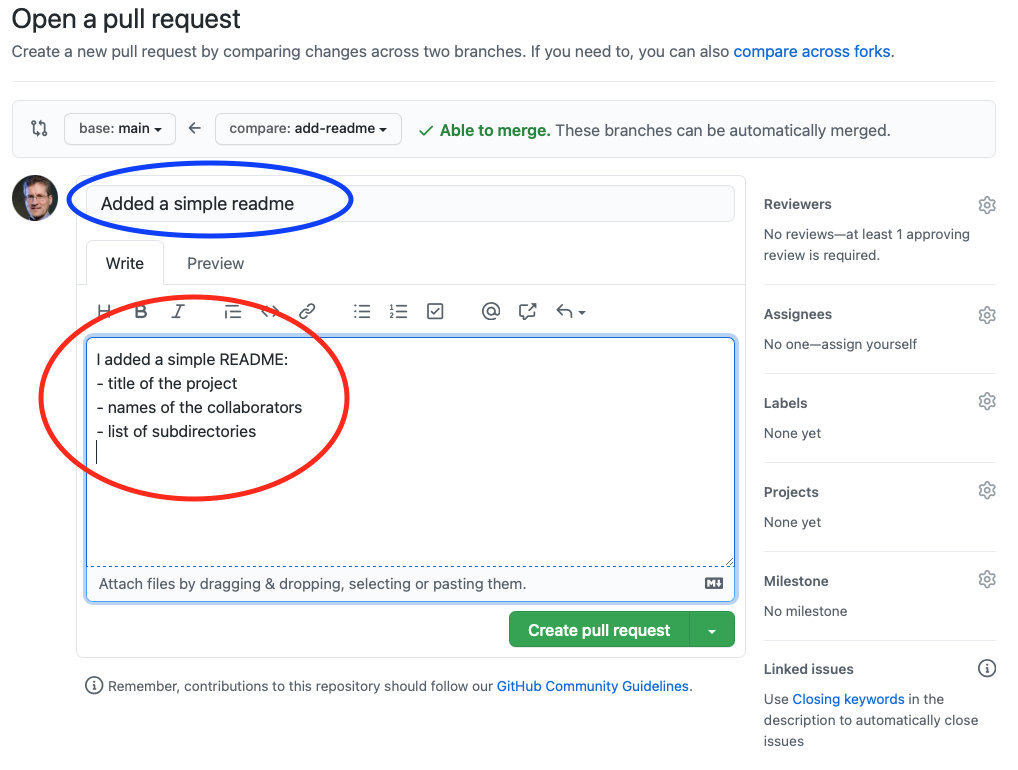
The short description (circled in blue above) is a short (one line) description of the feature being merged.
The long description (circled in red above) is a full description of the feature and all work included in this pull request.
Another example of a long description:
// Feature description
Adding a README that describes our project. Now when people arrive at our project they will know what it's about, how to compile and run it, and other important information.

// Other minor tasks accomplished
- Listed collaborators
- Added getting started instructions
- Linked to designs and other useful resources

// GitHub Issues that should be closed as a result of this PR
Fixes #13 // GitHub recognizes this syntax and closes issues automatically when PR is merged!
Fixes #5

## Testing:
// Brief description of what tests were run and the result
n/A
Now click on some of the ‘gear’ icons at right:
- Reviewers: List at least one teammate who needs to review this code. (For CS50, assign it to everyone on your team.)
- Assignees: List those who responsible for correcting the code when suggestions are made (should probably include you).
- Labels: (optional) Add labels that pertain to this code Pull Request.
- Projects: (optional) Add the pull request to a project. Useful for Scrum!
- Milestone: (optional) Assign to a milestone. Useful for Scrum!
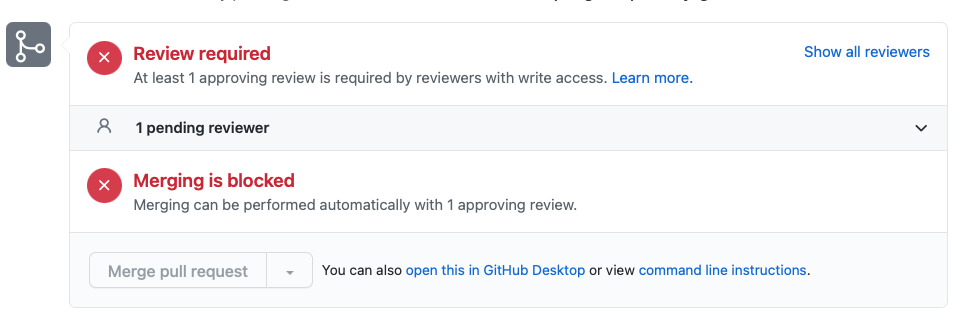
At this point, you cannot (and should not) conclude the process – which would merge this feature branch into the main branch.
That’s because someone else on your team should review it first.
If the main branch is protected (as it should be; see protect main),
you’ll see something like this:
Review
The review process is a really important part of any big coding project. As the developer, you have the chance to ask questions of your teammates about your implementation or style. And as one of those teammates, you are expected to give good feedback.
What is good feedback?
- Ask clarifying questions
- Suggest improvements to code style
- Comment on implementation choices (perhaps offer alterations)
- Enforce your team’s chosen standards
- Most importantly: Catch mistakes
Add a comment
To view changes to the files and add comments, select the Files changed tab in the Pull Request.
Add a comment by hovering over a line and clicking the “+” button.

Finish your review
Once you have added all your comments, click the Finish your review button.
Put in a comment that summarizes your review (e.g., Looks good! I suggested one or two changes).
If you are satisfied with these changes being merged in, select Approve.
Otherwise select Request Changes.
Merge
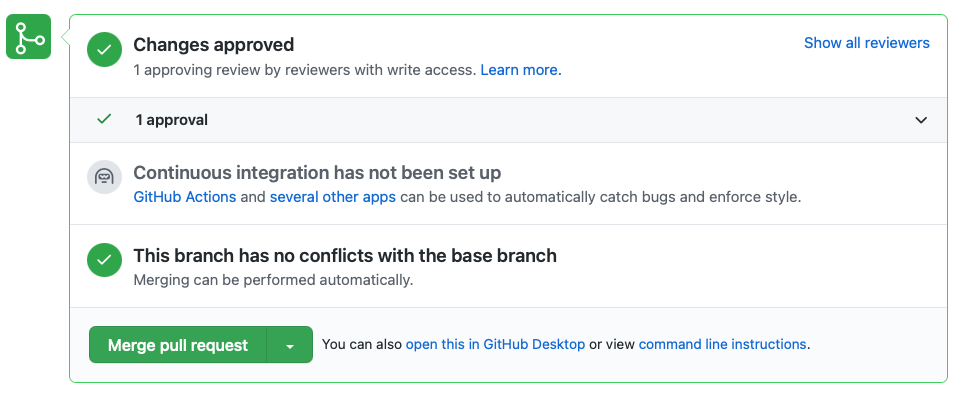
Guess what?!
Your Pull Request has finally been approved, so it’s time to merge it into main; either the submitter or Reviewer can now just click the Merge pull request button.
GitHub will ask you to confirm and give another chance for a comment:
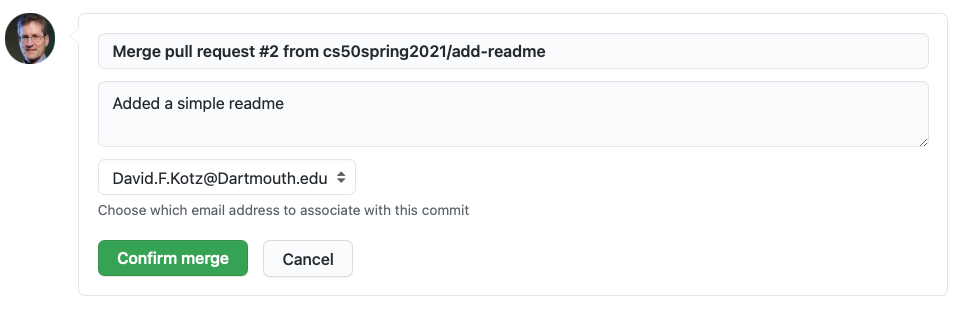
GitHub automatically conducts the merge and creates a merge commit.
Then, if you no longer need the feature branch, it’s a single click to delete that branch:

Finally
All developers should git pull origin main to ensure their (local) main is up to date with the new (remote) main.